
Install OptiMonk
📚 Manage Planet 4 > Integrate P4 > OptiMonk > Install
To install OptiMonk, you need to add a piece of javascript code to your website.
Your NRO Planet 4 Google Tag Manager container is the best place to implement this, here’s how (instructions also available on the Optimonk Support forum) 👇:
#1 – On your account dashboard, select “Insert Code” or select the code (</>) icon on the left sidebar. This will open a pop-up window your account javascript tracking code.

A pop-up will appear, with the script of your Optimonk account

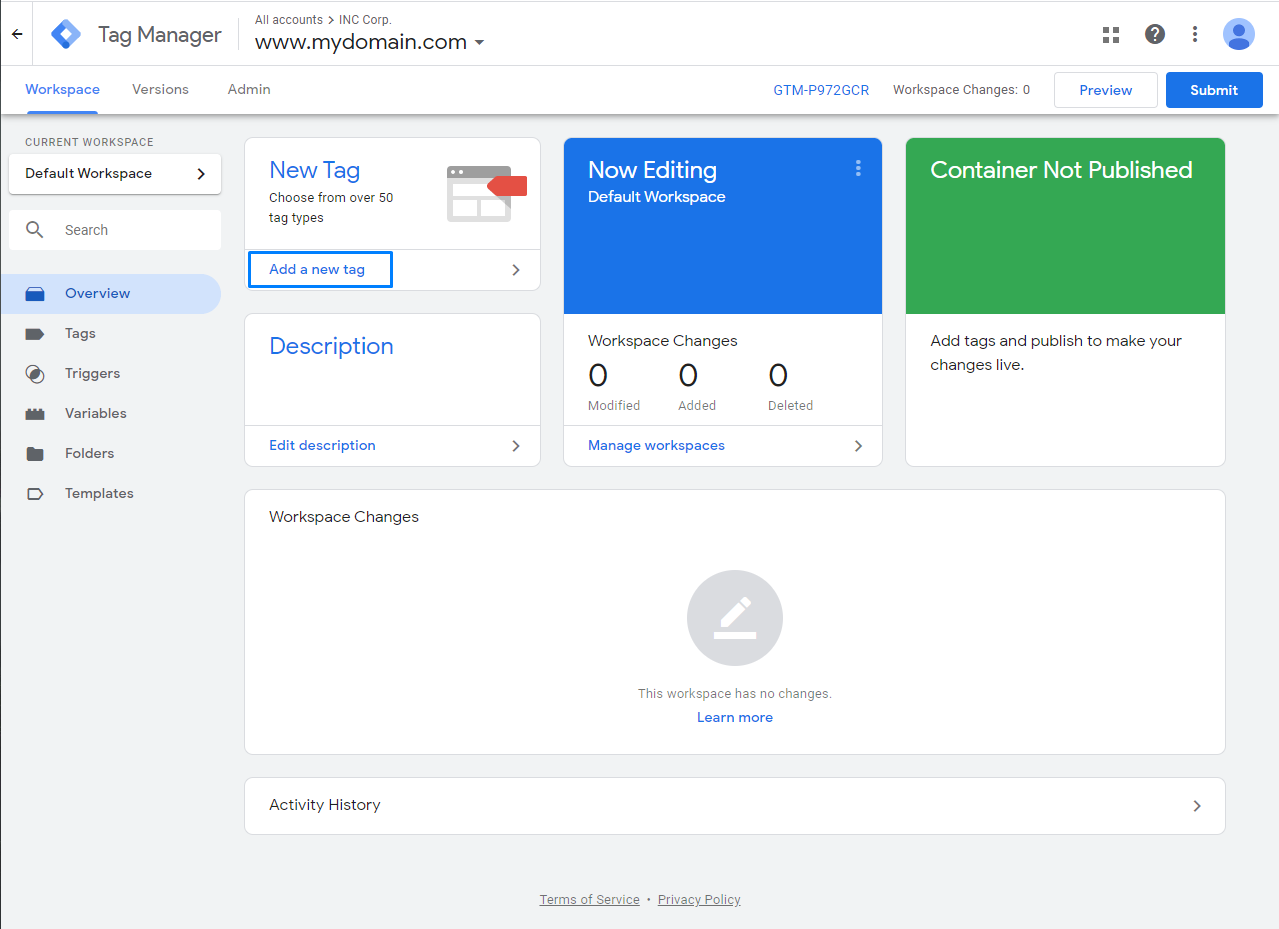
#2 – Copy the script and open your Planet 4 Google Tag Manager container. Don’t forget to use the same container you have implemented on your Planet 4 website.
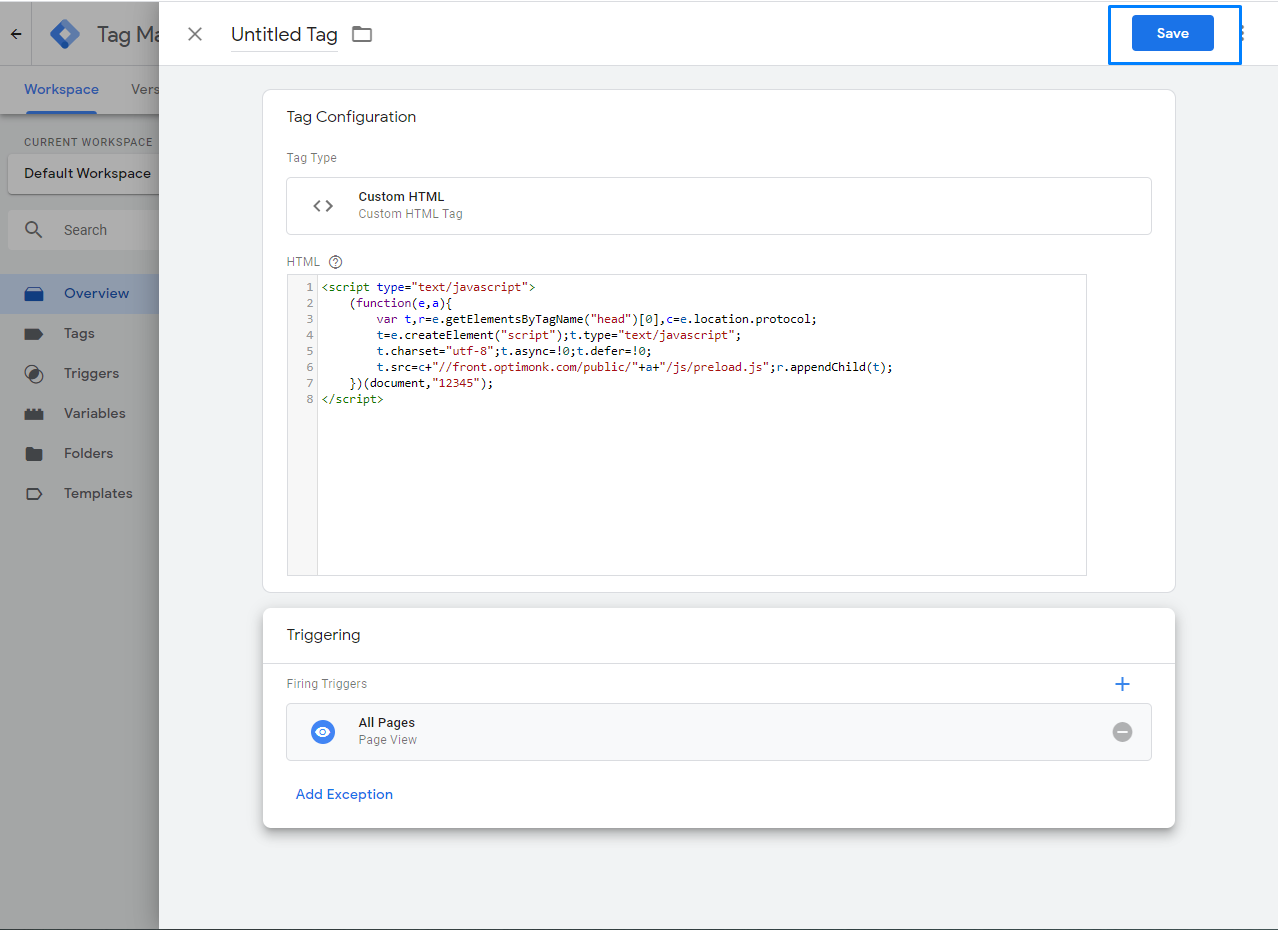
#3 – In Google Tag Manager create a new tag.
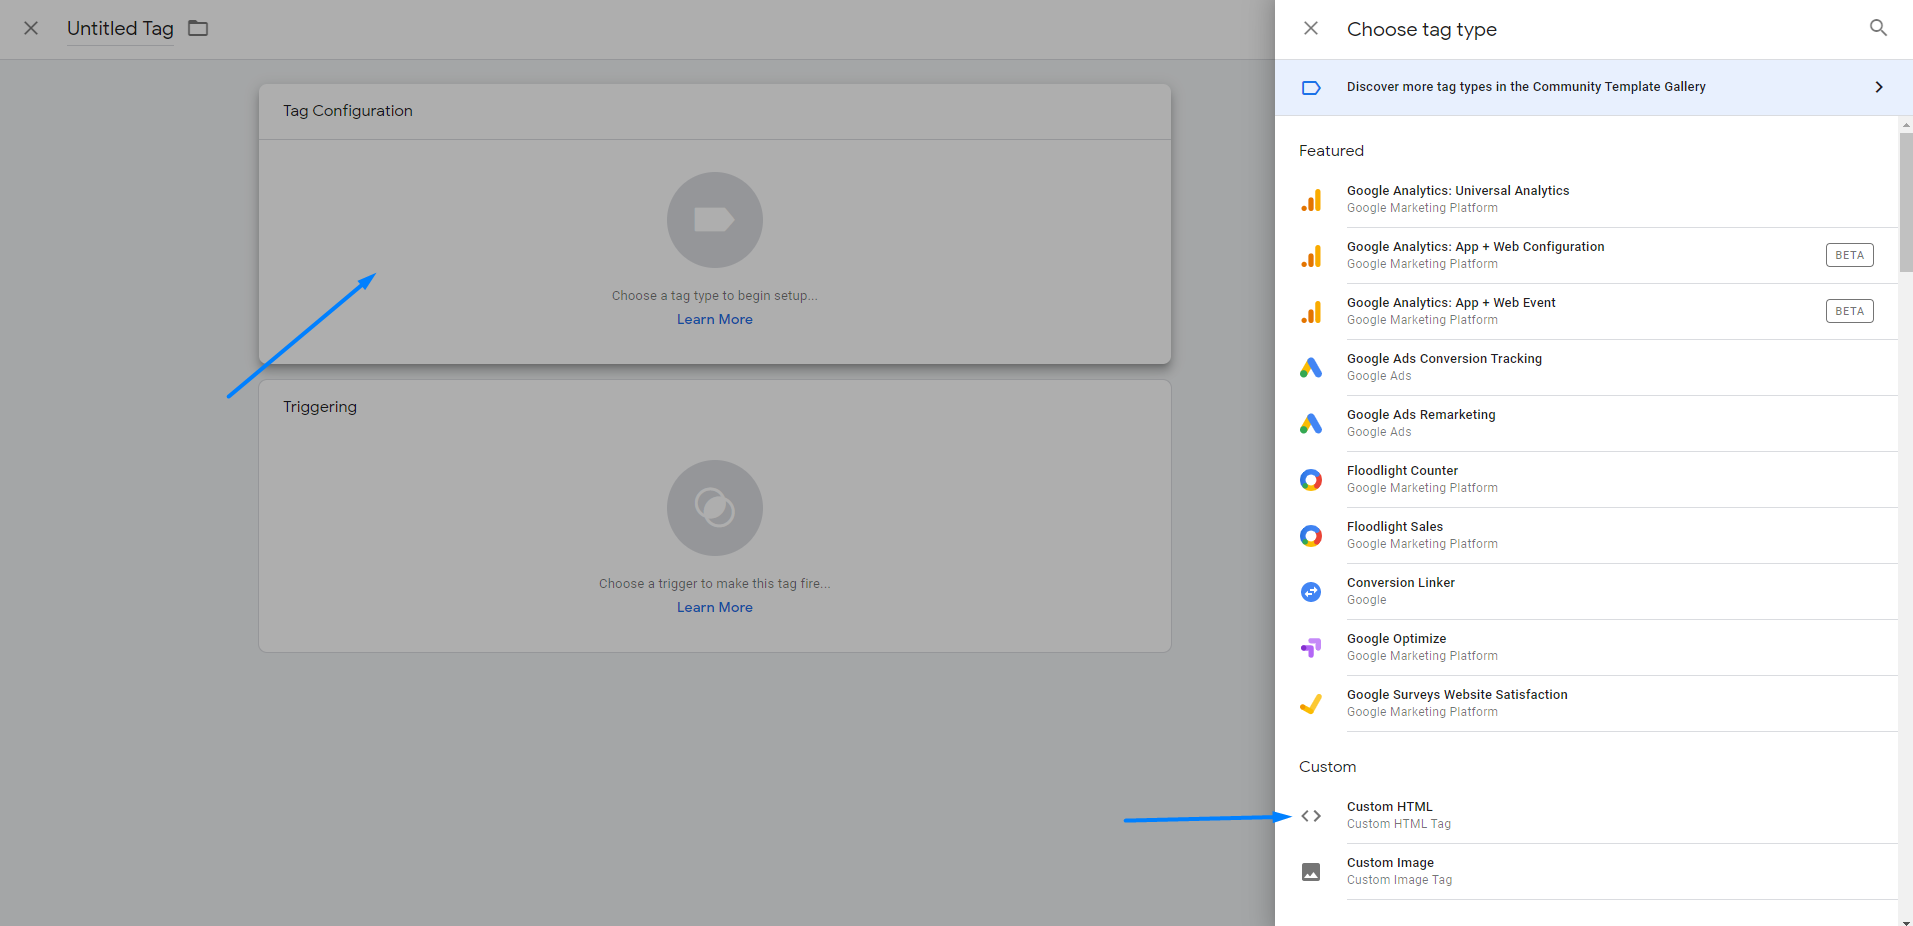
#4 – Select a Custom HTML Tag
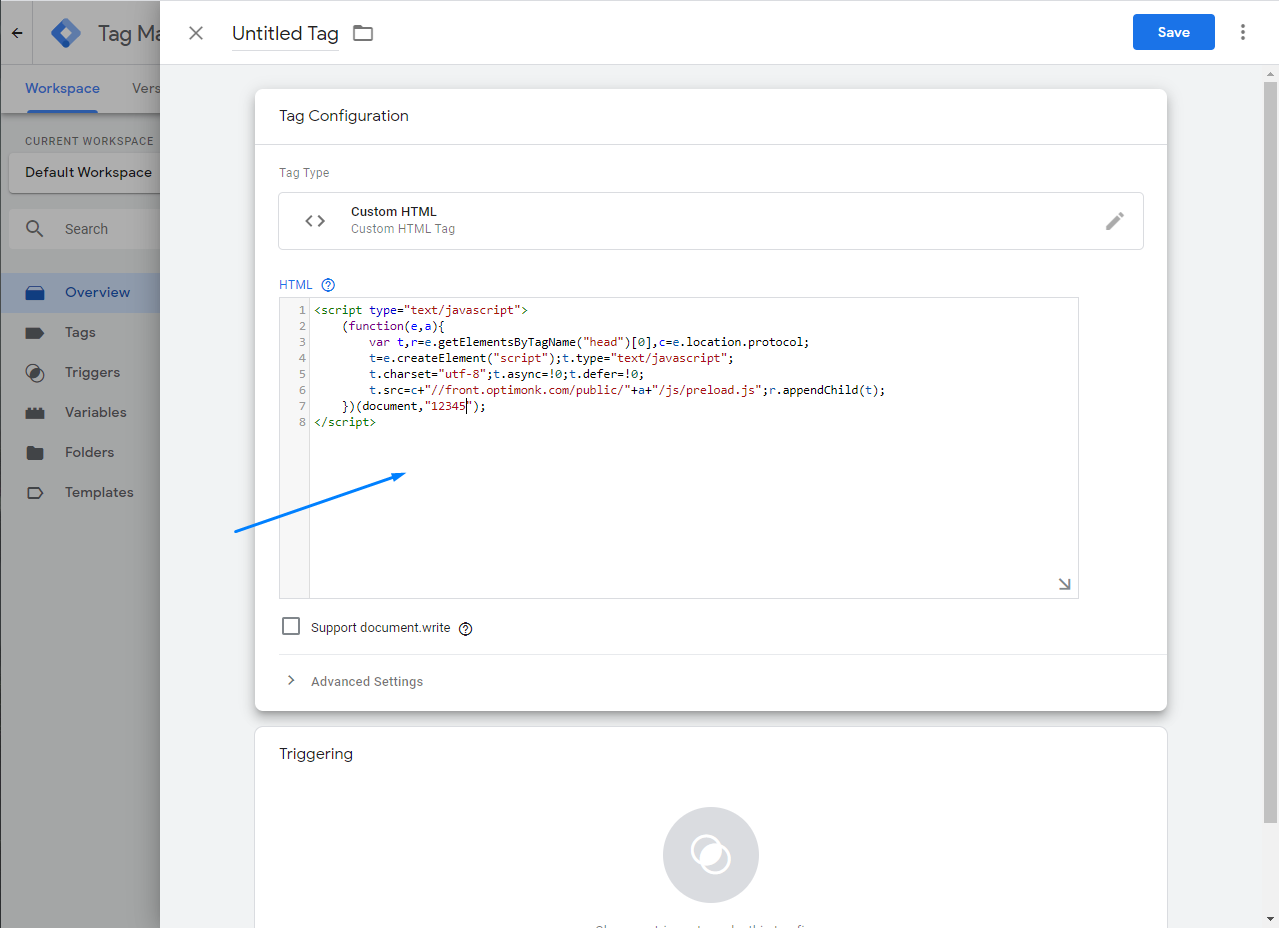
#5 – Paste the javascript code you’ve copied from your OptiMonk account:
#6 – Add a trigger to fire OptiMonk’s tracking code on Planet 4 pages.
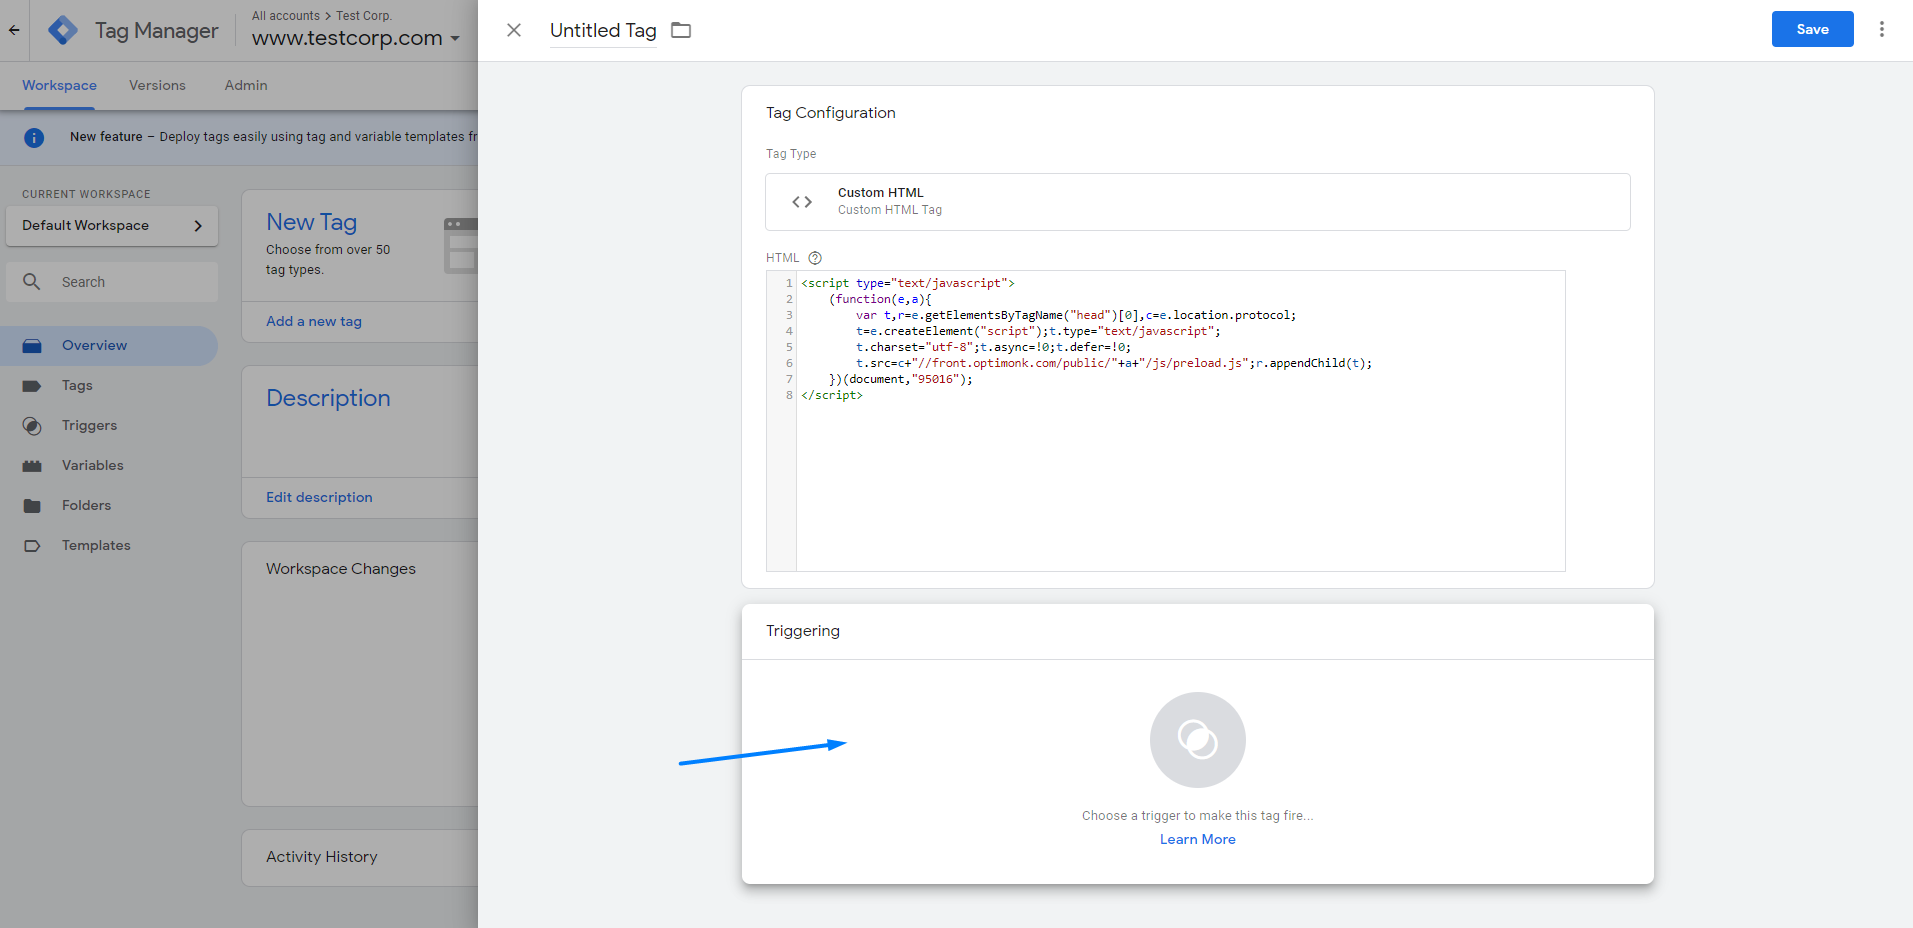
Important: We also recommend NRO’s that work on countries under GDPR law to block OptiMonk’s tracking code for users that didn’t consent to the Privacy Policy. Read our documentation on how to create GTM triggers based on user consent.
#7 Hit “Save” and Preview to make sure your tag is firing correctly and publish a new version of your container.
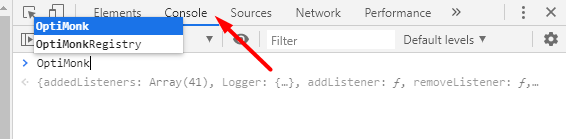
#8 – Done! You can check if the OptiMonk code is implemented on your website by opening your website in Google Chrome, pressing F12, select Console view, click in the white text box, then type OptiMonk:
You can also check the status of the tracking code under your OptiMonk’s account > Settings > Domains.
