Categories, Tags and Post Types
Taxonomy, or categorization, of content is to organize the content for your visitors organically on Planet 4.
📚 Manage Planet 4 > Administration > Setting up the Basics > Categories and Tags
The theory
The idea behind Planet 4’s new information architecture is to go from a highly web-linked site structure, to a hybrid between weblink and hierarchical layout. This approach will be achieved through the intentional establishment of #tags, categories and post types in an informed and logical manner.
🤔 Key info: Even if organic navigation facilitates access to semantically-related topics based on user initiative, web-linked structures are often the most difficult for users to understand for 1st time visitors who want a basic understanding of a topic. This is why a hybrid approach is the best way to go.
Understanding the difference
Understanding how the user navigates the site is extremely important for all content editors, creators, campaigners and admins. In Planet 4 there are 3 main types of taxonomy features: Categories, Tags and Post Types. These apply mostly to Posts.
Properly defining Categories is key to organizing your posts in a thematic and logical structure. Revisiting your Post Types can help streamline content filtering, while refining your #Tags allows users to explore specific topics more organically—similar to how navigation works on social media platforms.
We have a number of blocks which rely heavily on your categorization (see the Post List Block and the Action List Block). Get to know them closer so you can make the most of their functionalities!
Categories
With the implementation of the new Information Architecture, P4 Categories are intended to represent broad thematic areas—main content “baskets” under which related posts can be grouped. These should be wide enough to encompass multiple relevant topics. (eg. Climate Change, Social Justice, or Oceans.)
🧑💻 To set up your Main Navigation, go to this page in the Handbook.
Tags
Compared to the categories (which encapsulate a broader concept), #Tags should be strictly content-specific (e.g #Shell / #PlasticBan, etc.). Tags should not be hierarchical, but treated as standalone entities. Basically, P4 should use #tags the same way Social Media does. Tags can also be geographic, political, brand and campaign-related. A post can have more than one tag, but you have to be mindful that your #tags truly represent the content you are creating, you don’t want to have #tags that contain only one post, so we do recommend that you study your content in advance.
Here are some examples of appropriate tags: #DonaldTrump, #LGBTTQIA2S, #SaveTheArctic, #Tasmania, #Nestle. These are just examples. The idea is for this framework to be flexible enough to represent the relevance and periodicity of the content of your P4 Site. For example if “Save The Arctic” is one of your main campaigns, this might be better suited as Category rather than a tag. If it’s not but you occasionally write about it, then labeling it as a tag would be fine.
We know this process can sound overwhelming, this is why the P4 Team has workshops to guide you through this process. Reach out if you’d like assistance in this regard!
Setting up Categories and Tags
Categories Set up
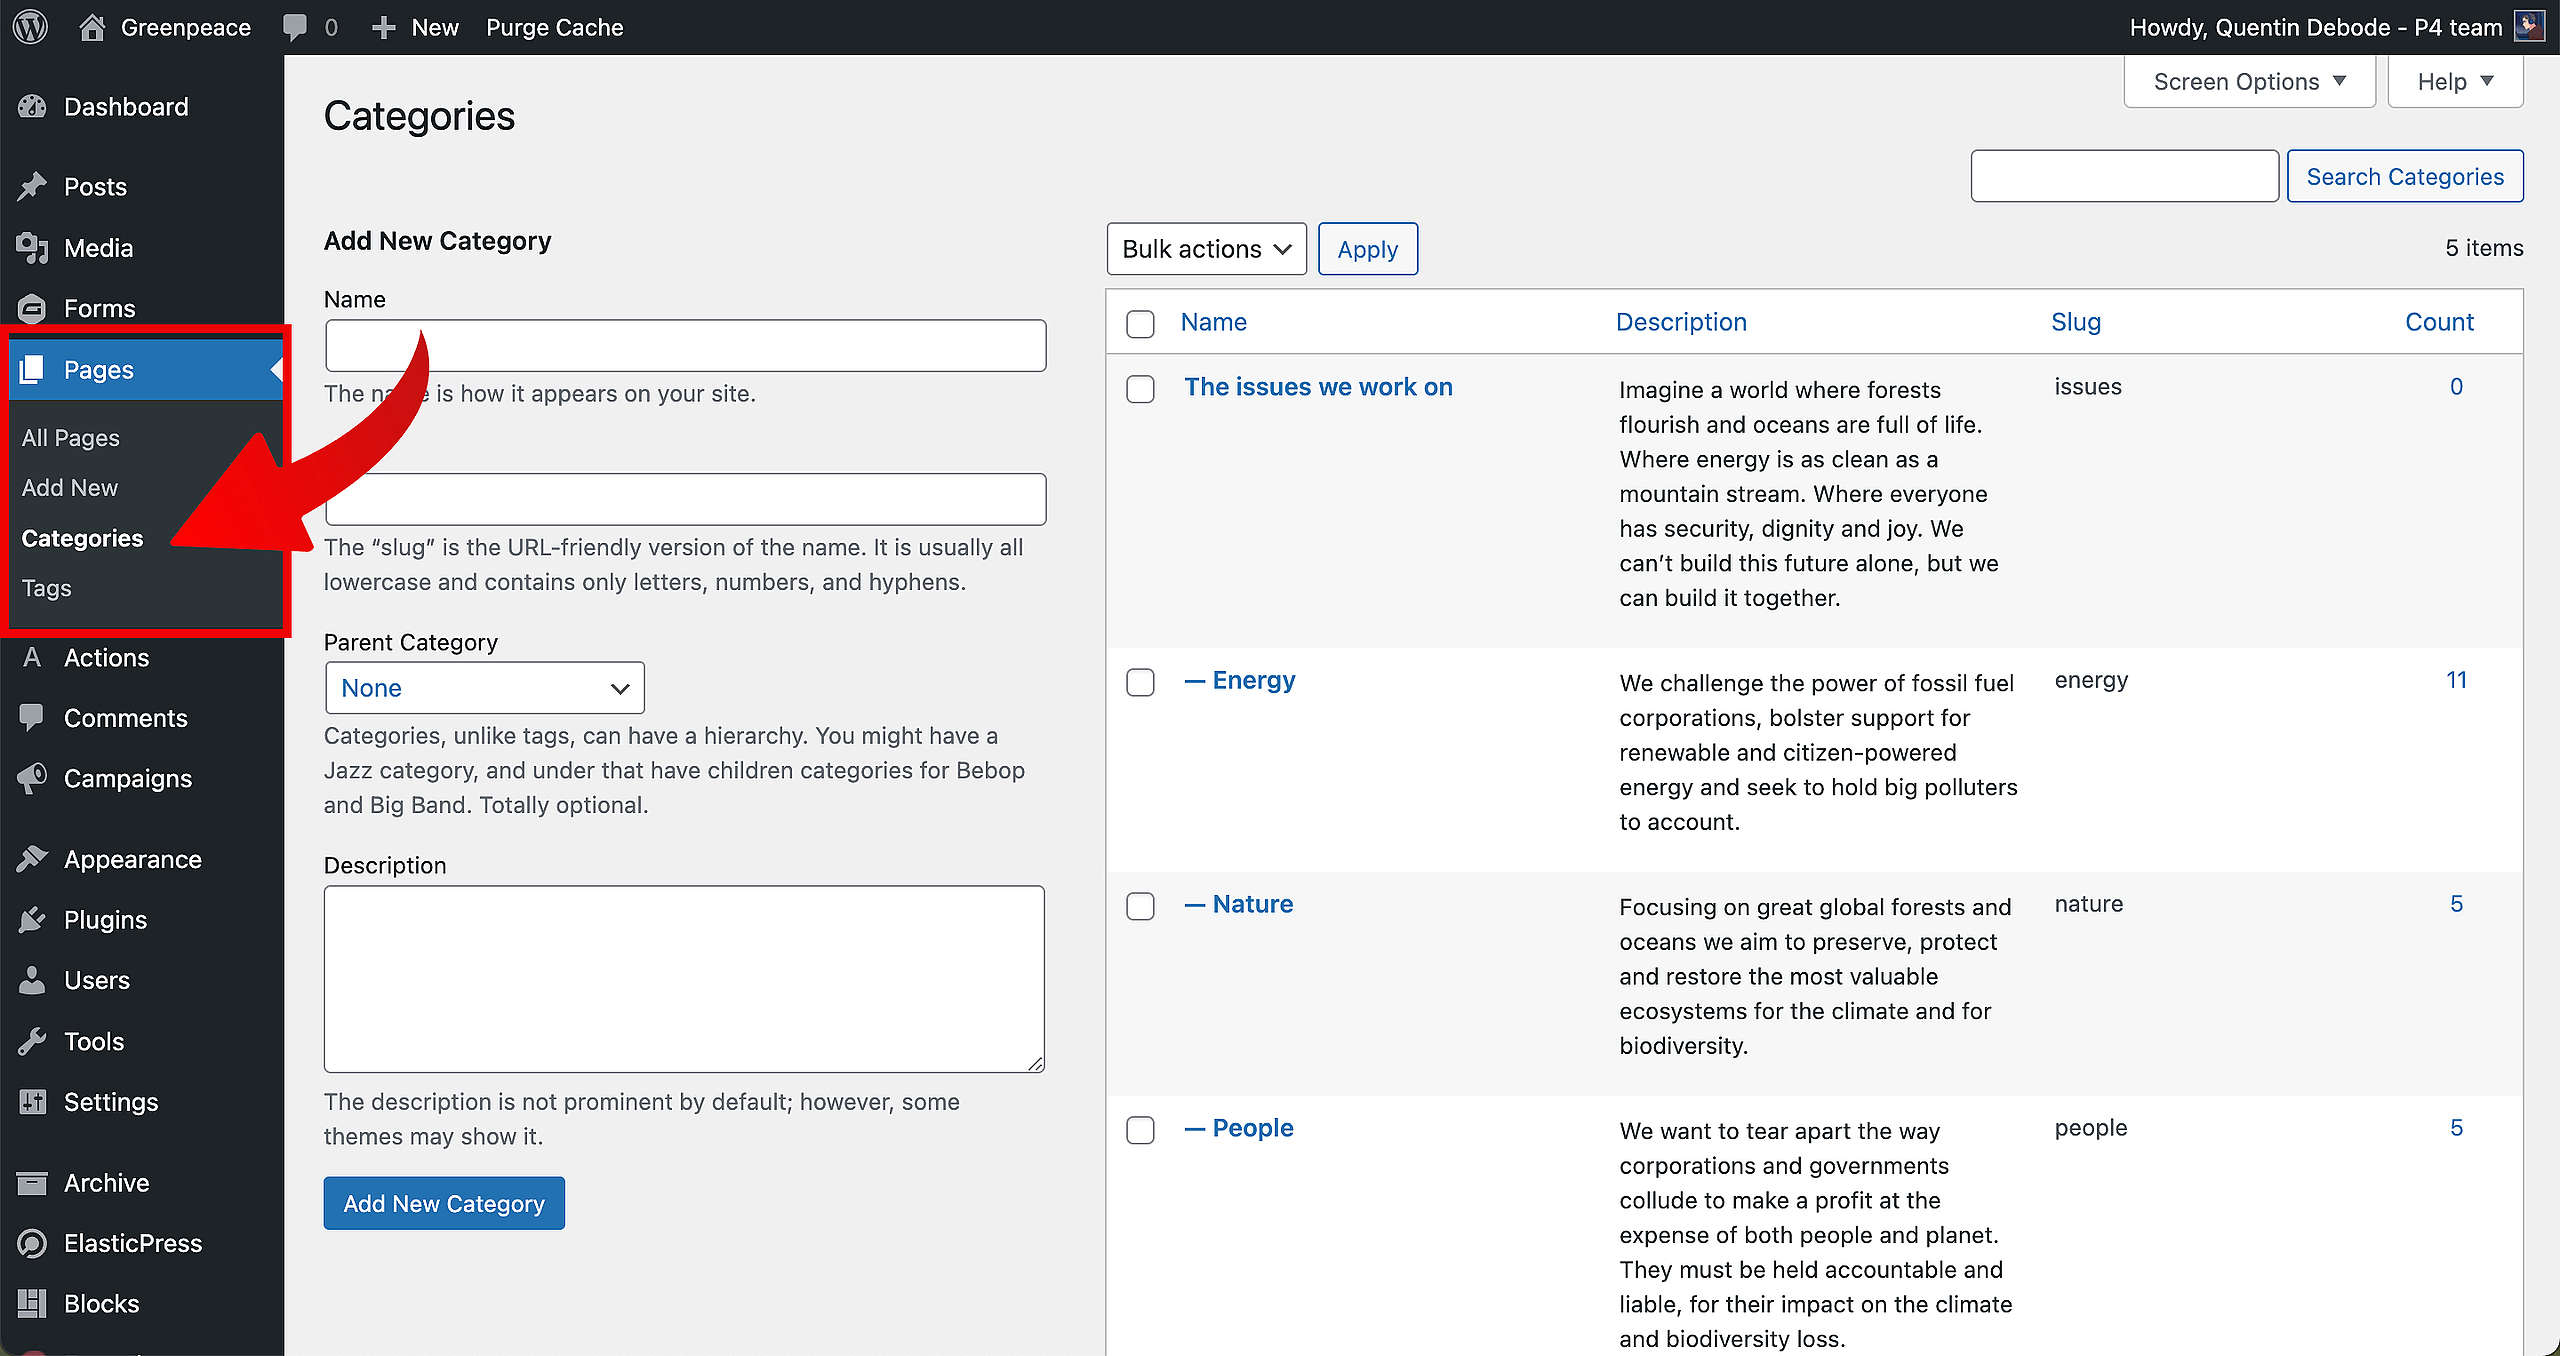
🔎 Where? You can find this by going to Dashboard > Pages > Categories
First, go to the Categories page in your backend. The option to create a new Category will immediately show up.
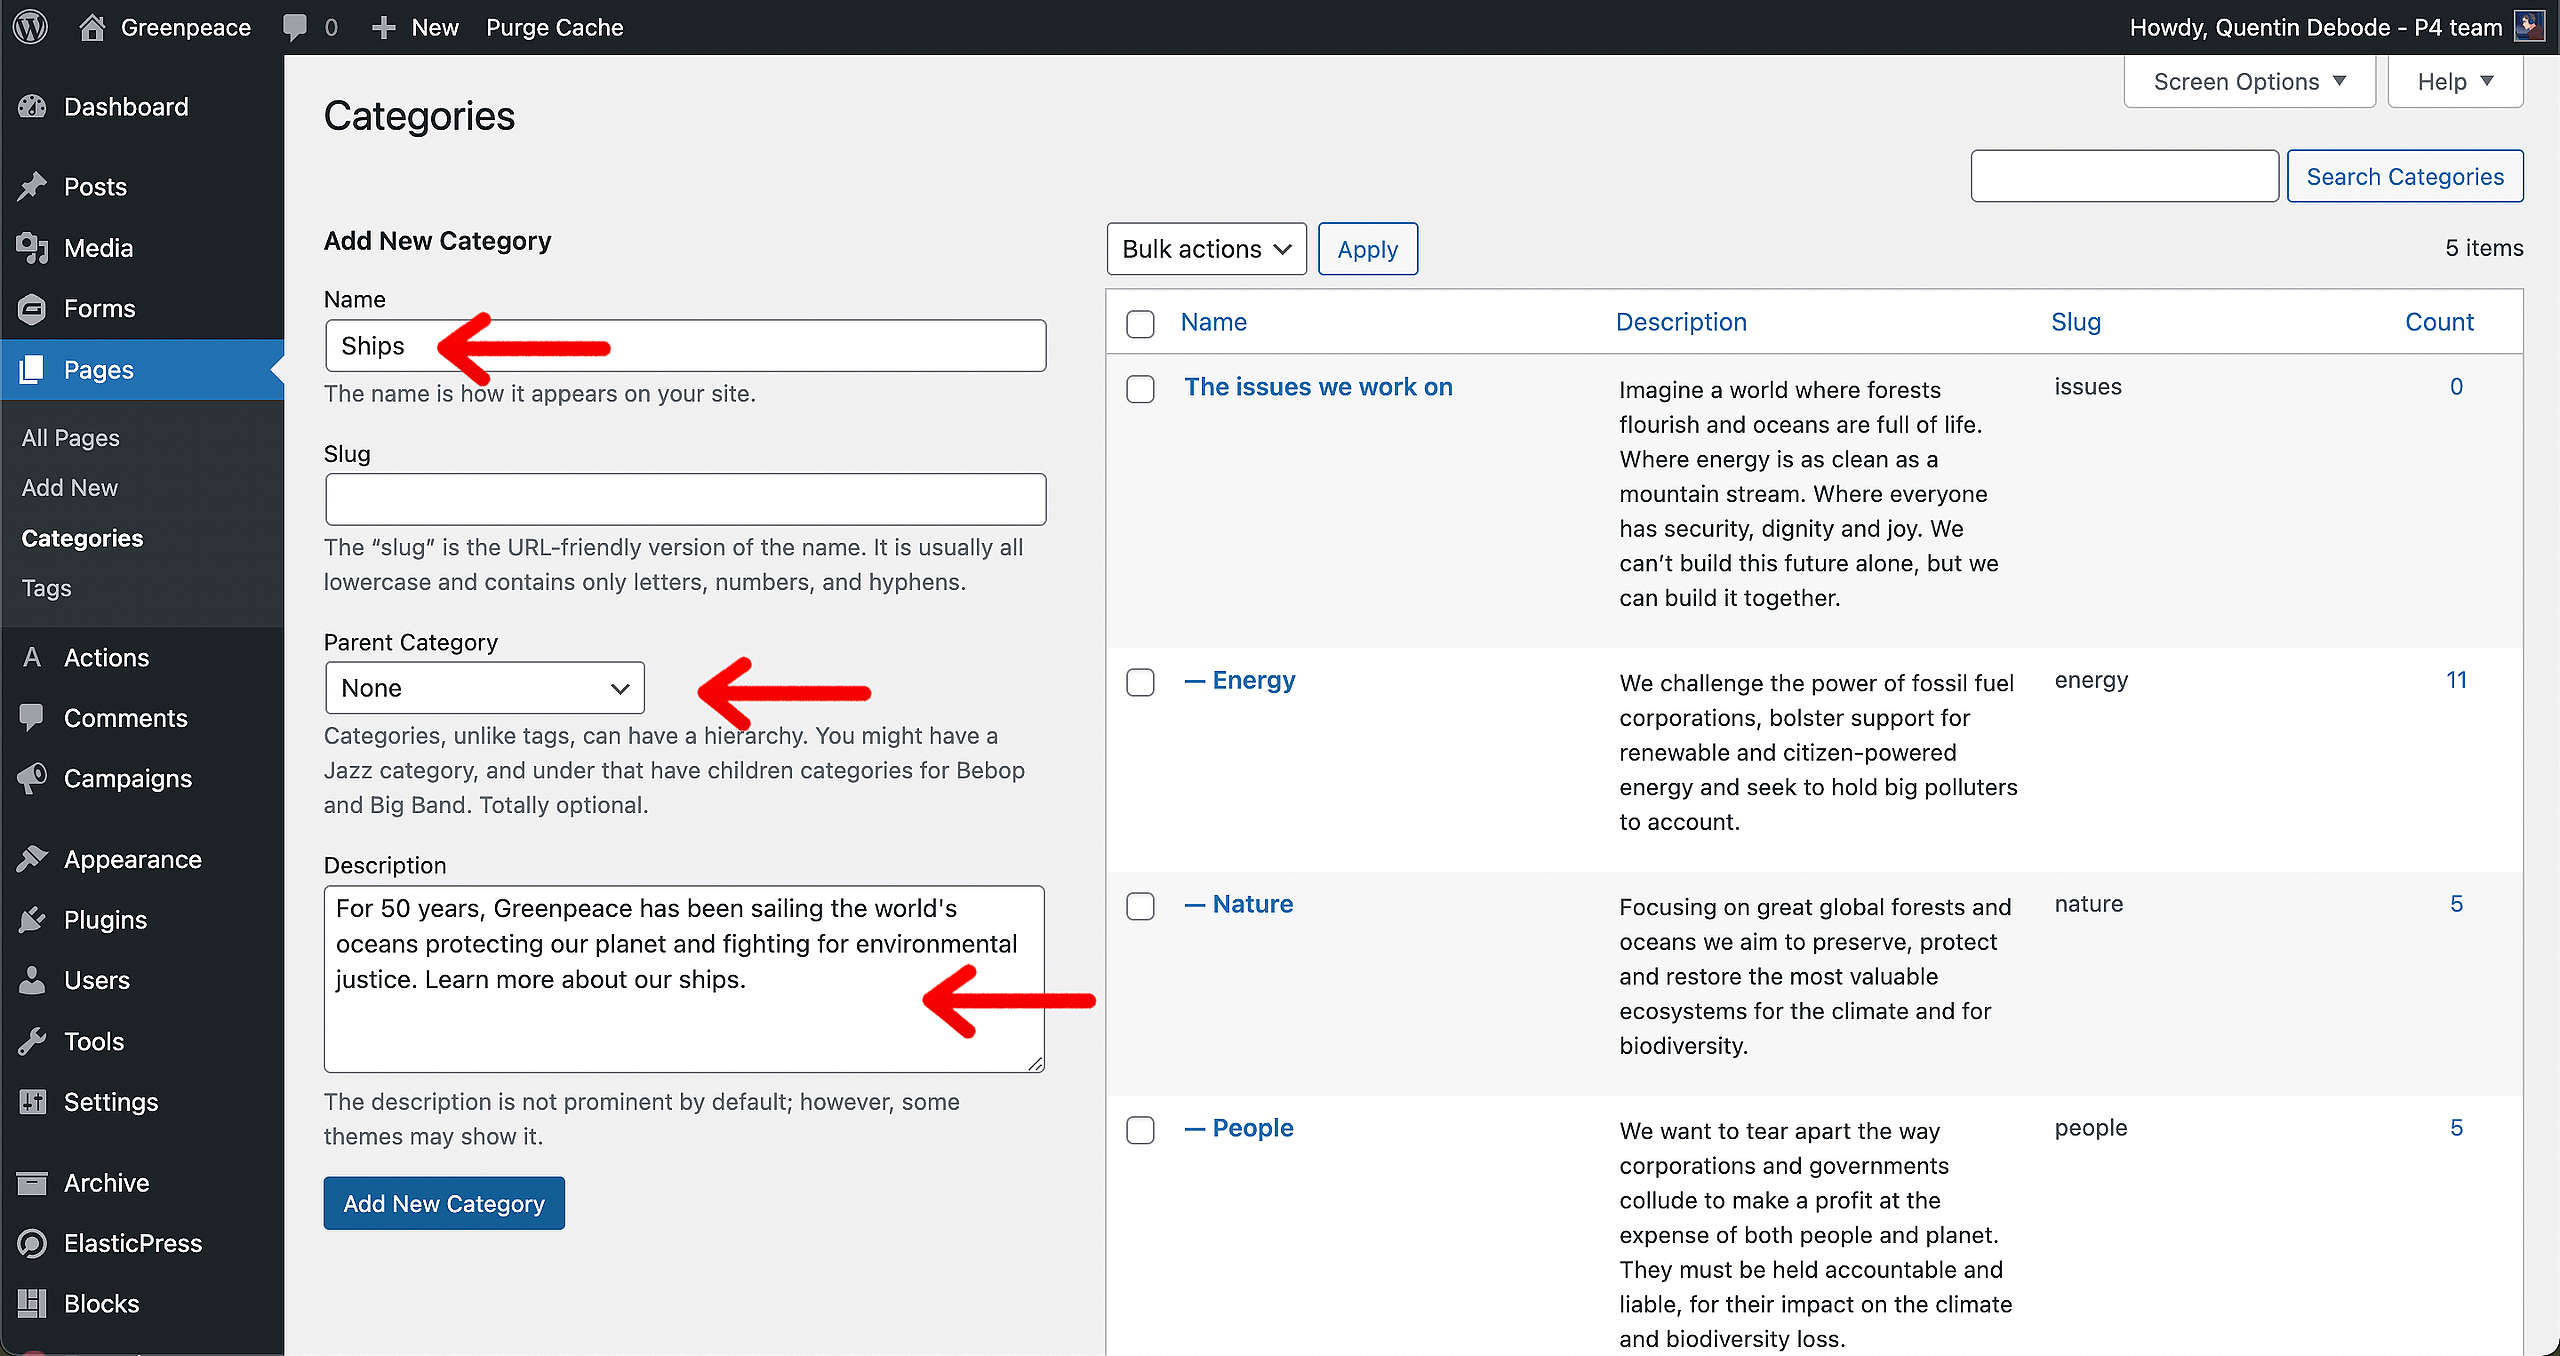
Fill in the name, slug (optional, if you leave this blank the slug will be the name of the Category), a parent category (if this applies), and a short description.
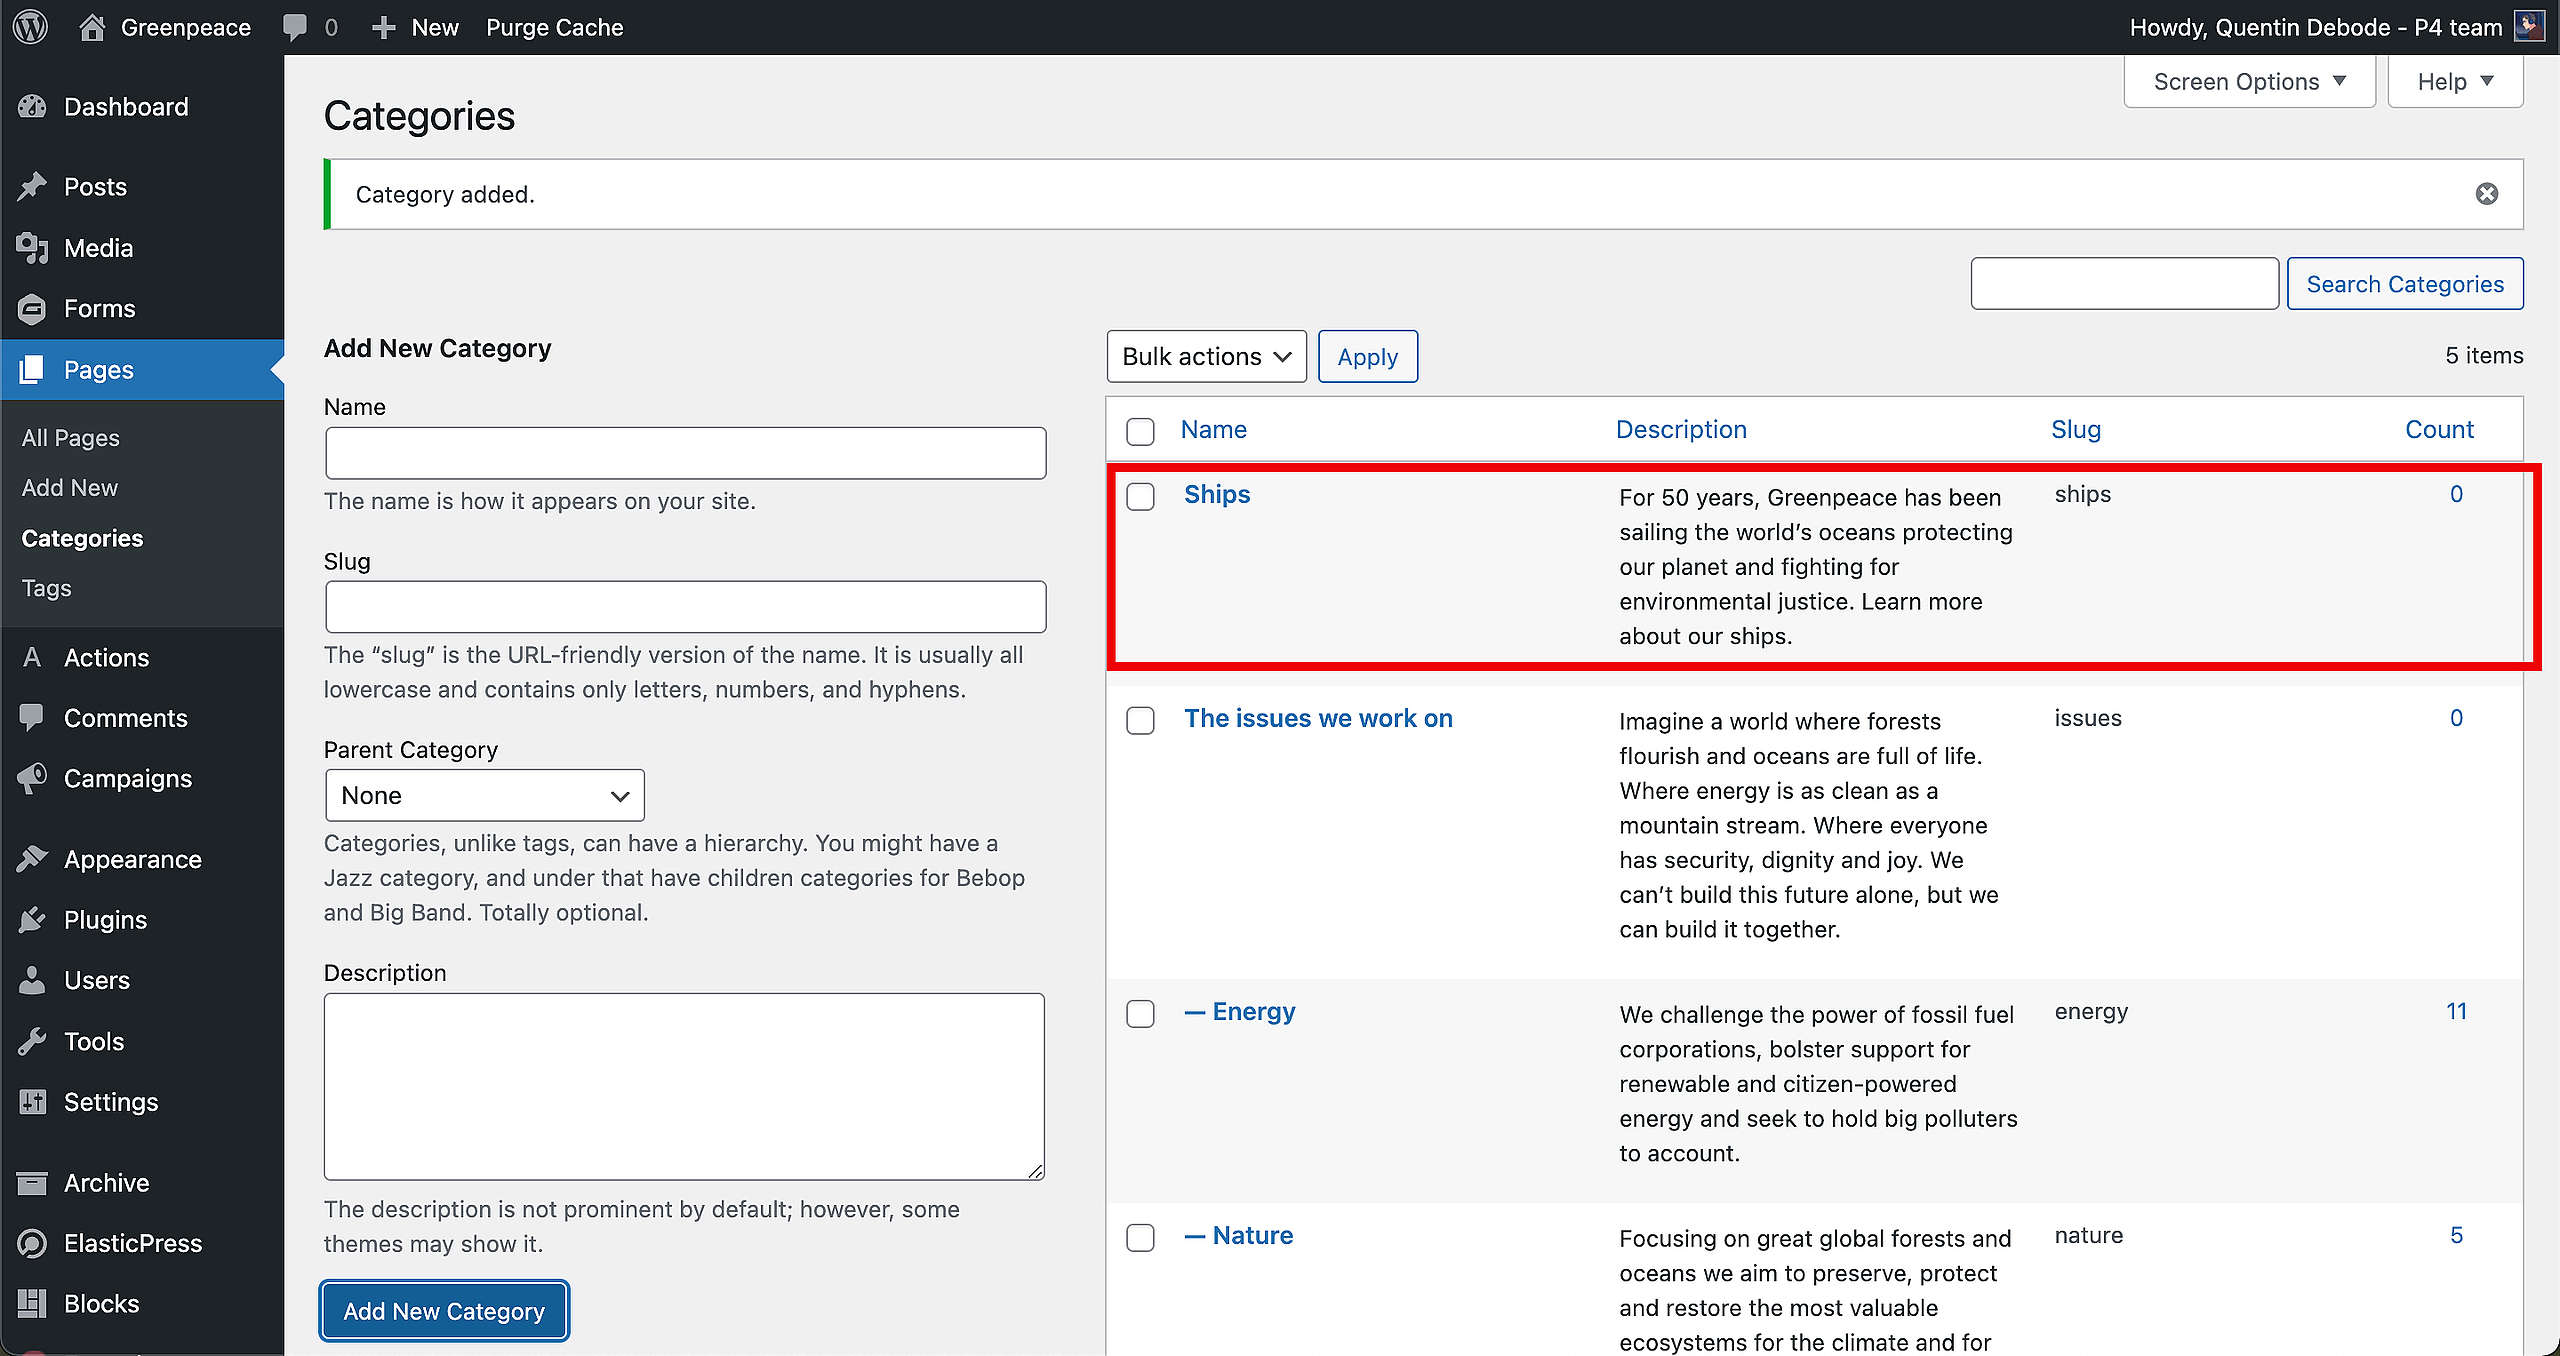
After you’ve filled in all that information, click on “Add New Category” and you’ll see it appear in the box on the right.
Tags Set up
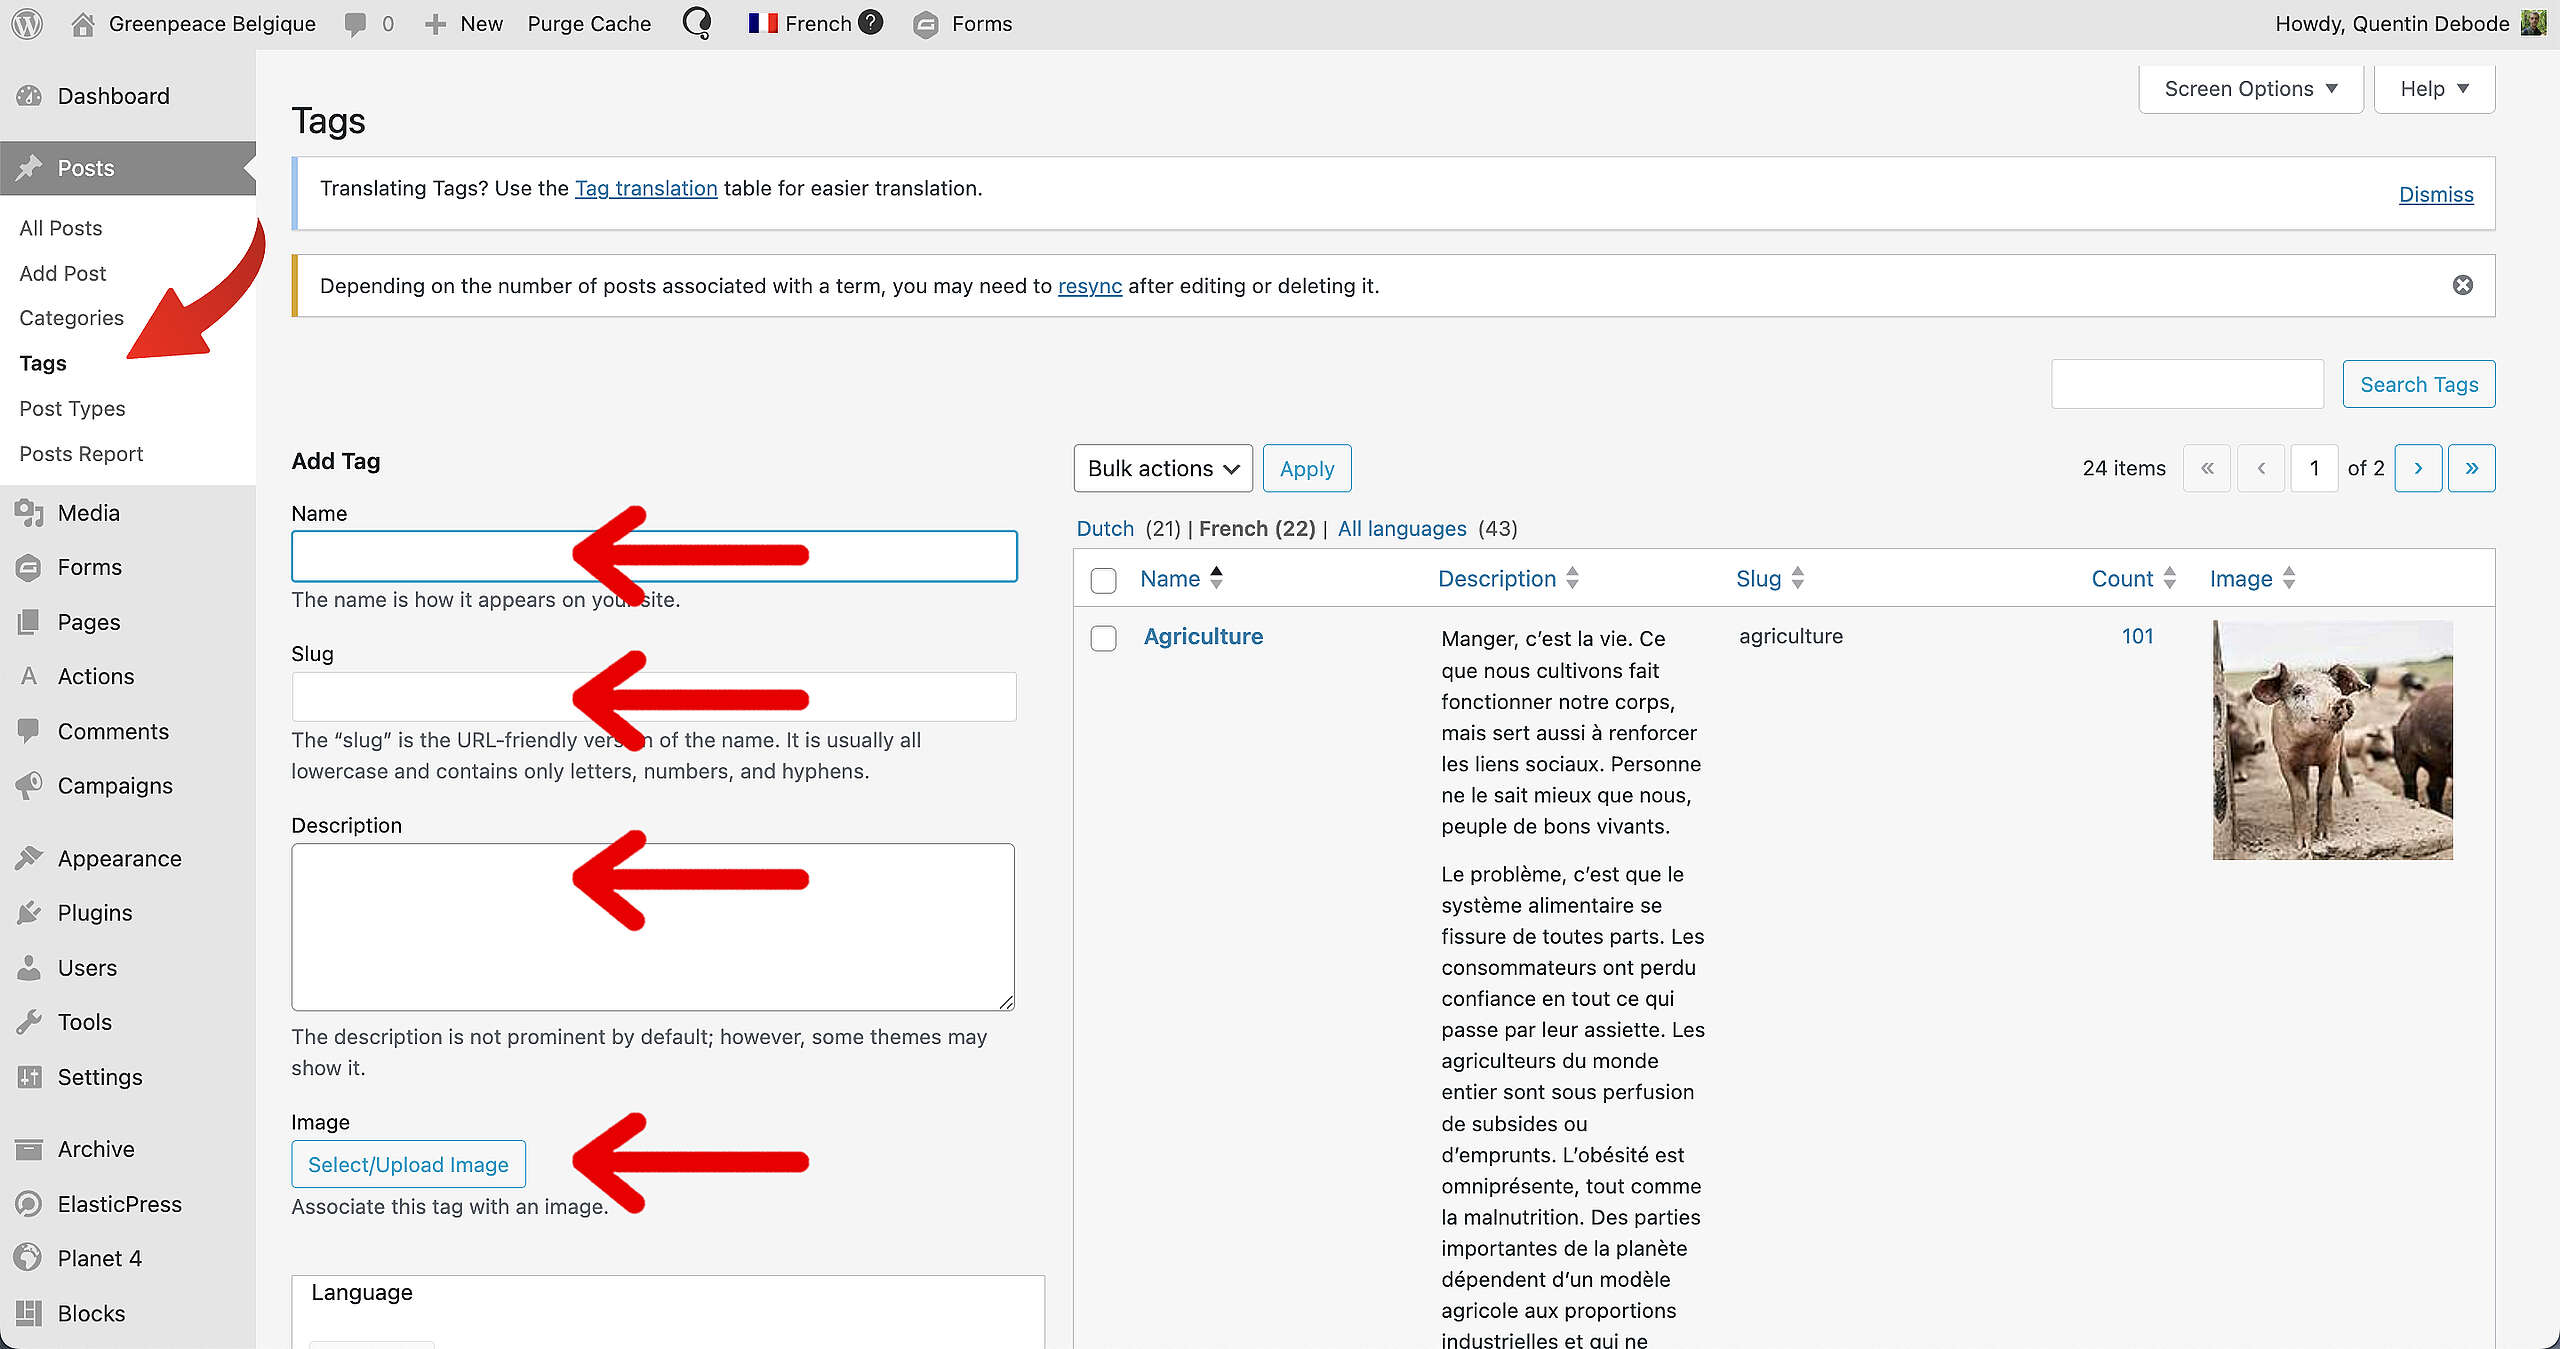
🔎 Where? You can find this by going to Dashboard > Pages > Tags
To set up a new Tag, go to the Tags page in your backend. Here, you’ll also see the option to add a new Tag as soon as the page opens. Fill in the Name of your Tag, slug and a description.
In case you want to redirect your Tag to a proper page: Make sure to first create the page (more on the Deep Dive Topic Page here) and then use the P4 Redirection tool to bring visitors from the Tag to the Page.
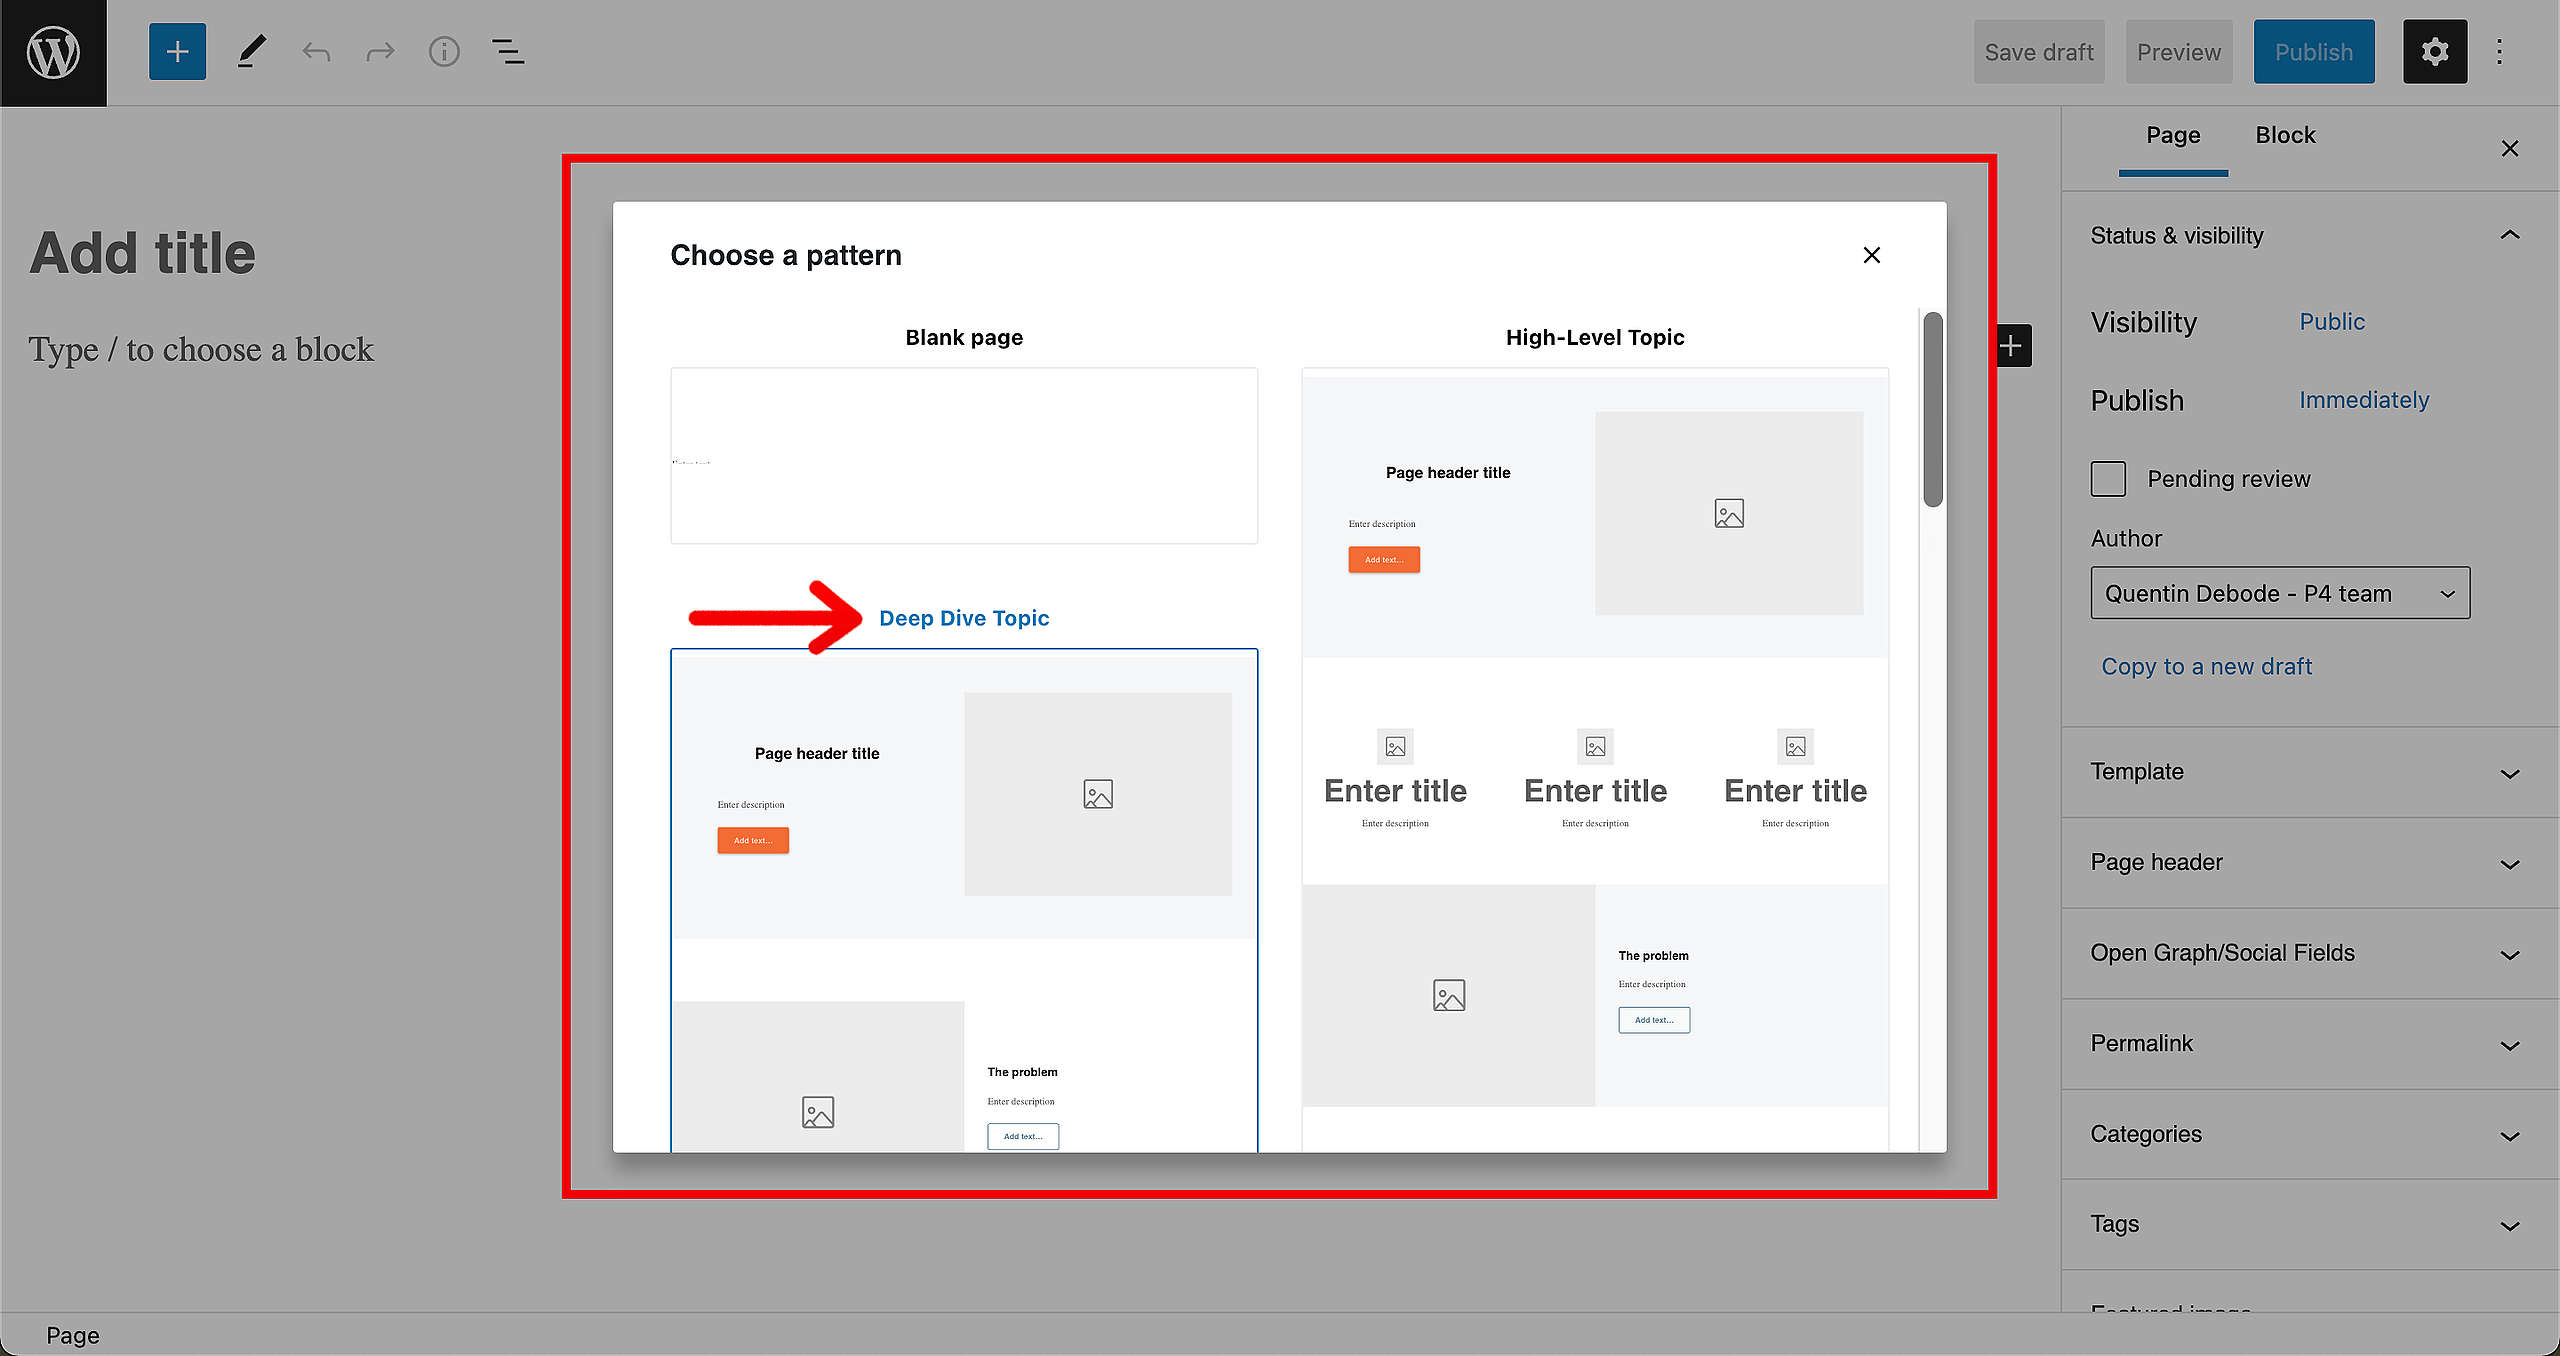
So, in case you have no Tag page to redirect to yet: Start a new page and choose the Deep Dive Topic pattern.
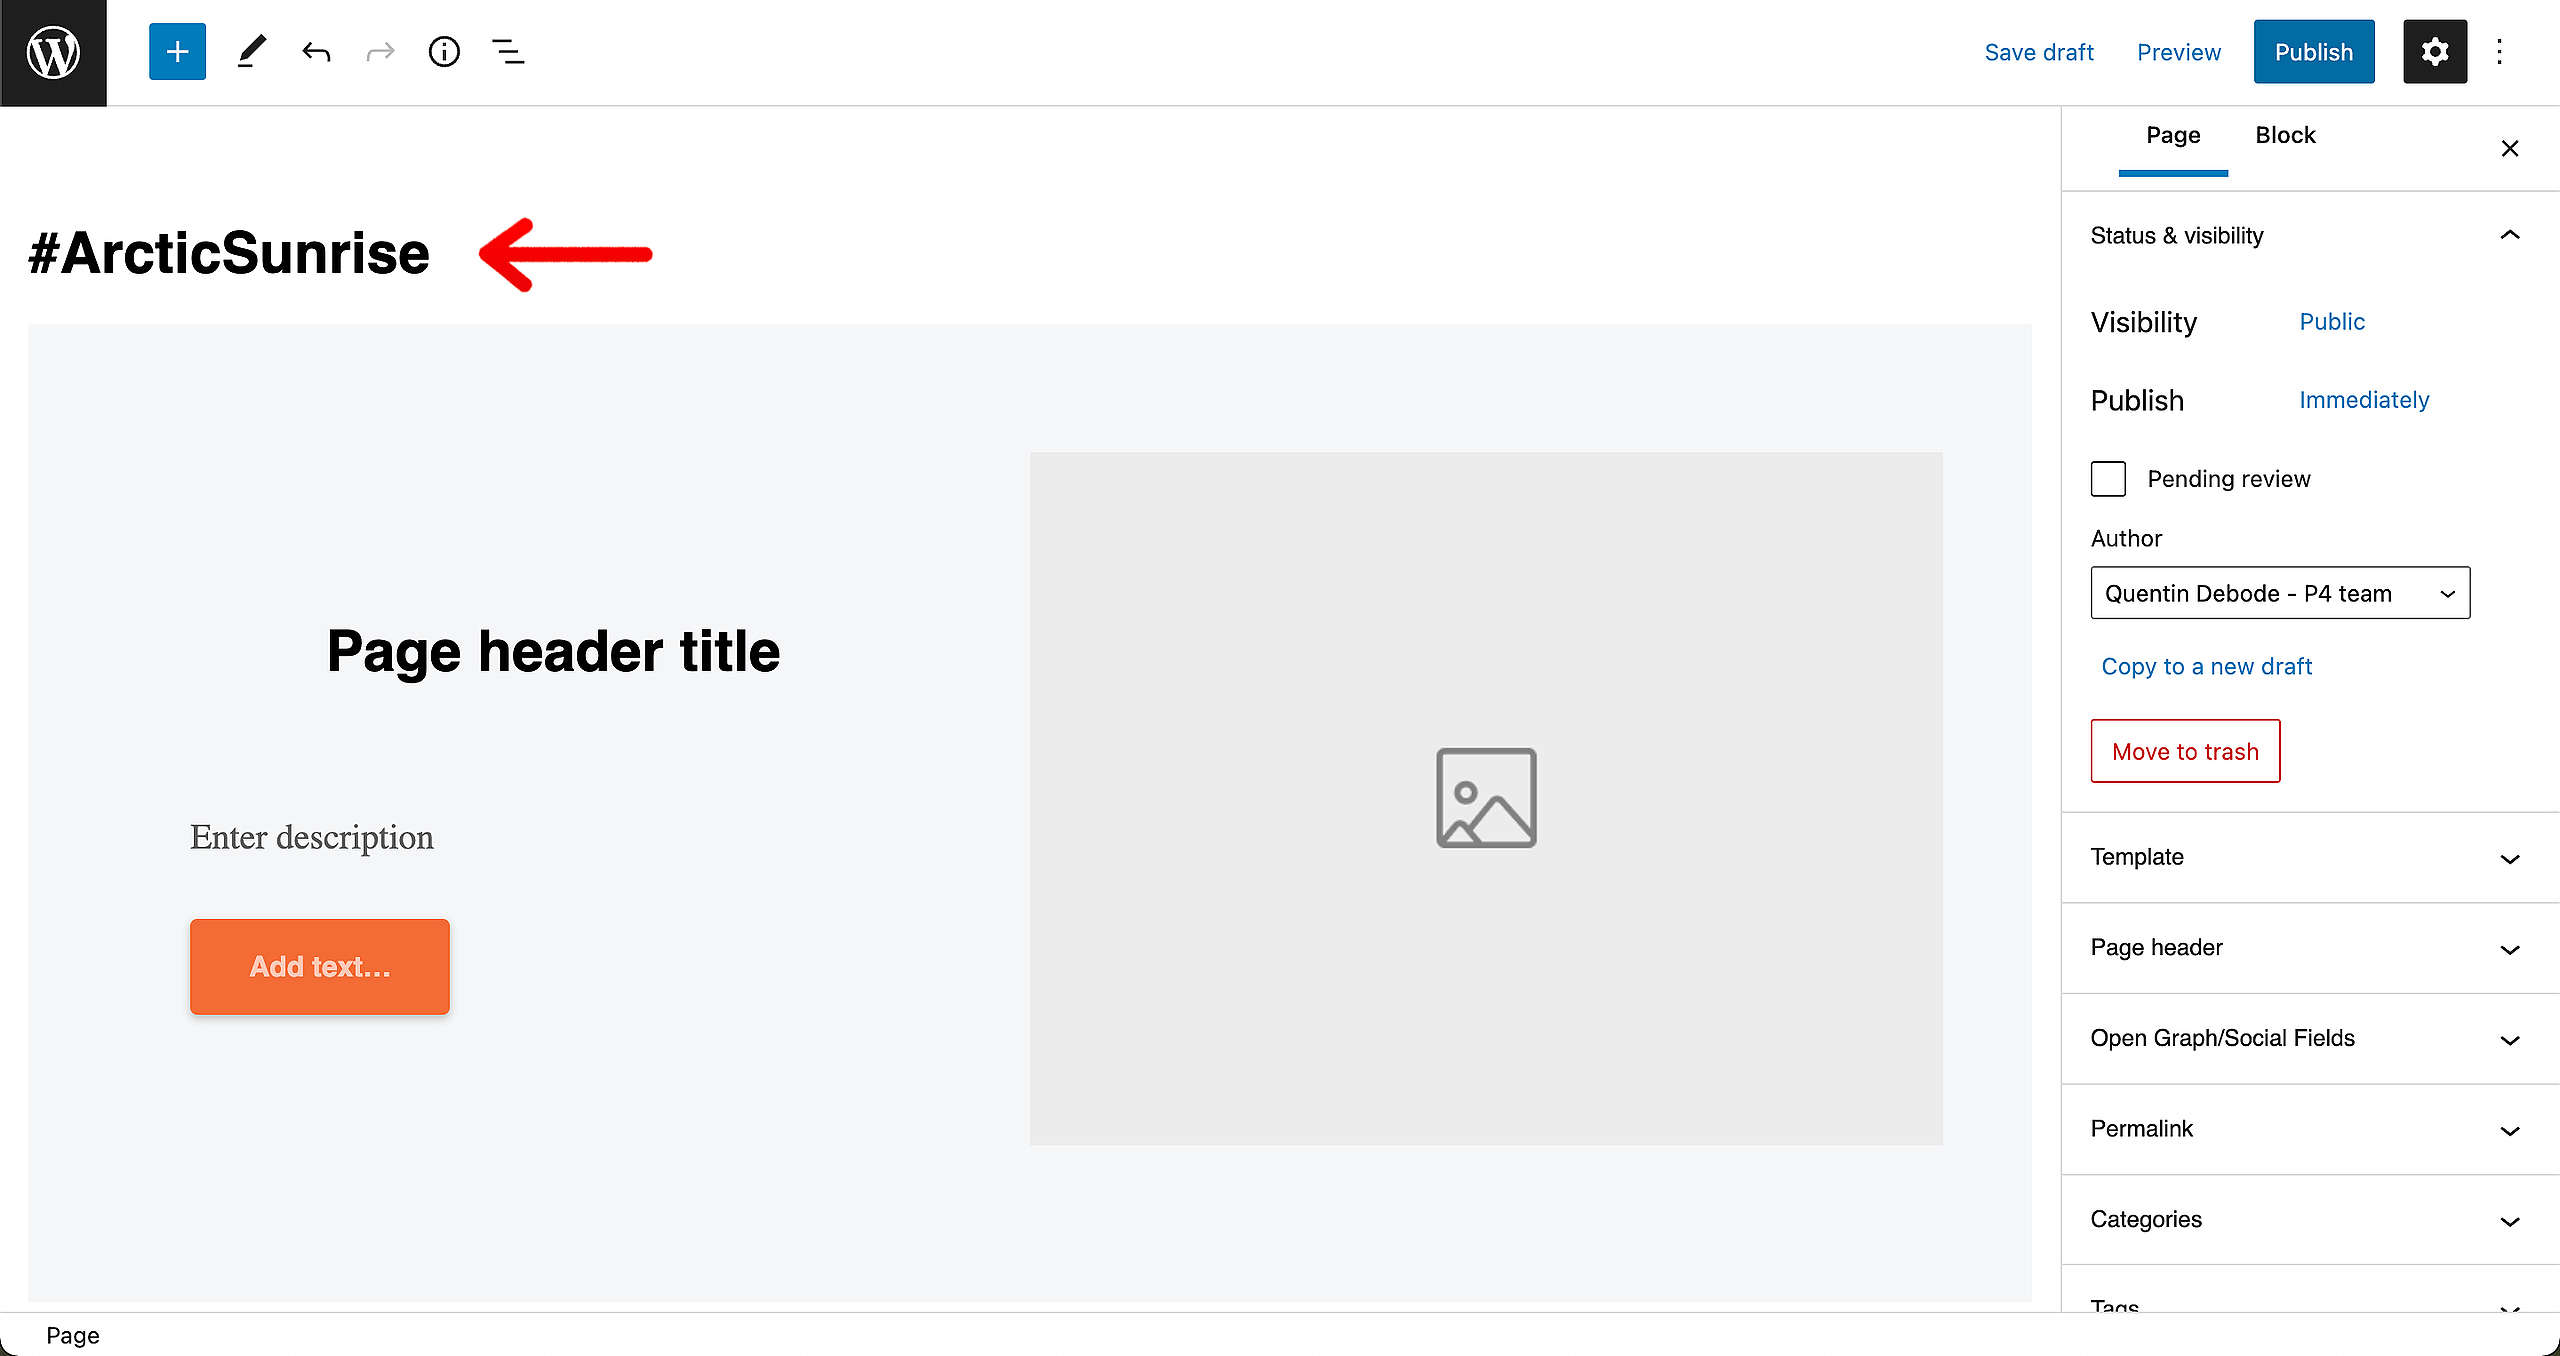
After this, fill in the page title. Best to use the same as the Tag itself, to avoid confusion. For now, we’ll leave the rest be and just publish the page as it is. (To learn how to Create a Page, go here in the Handbook.)
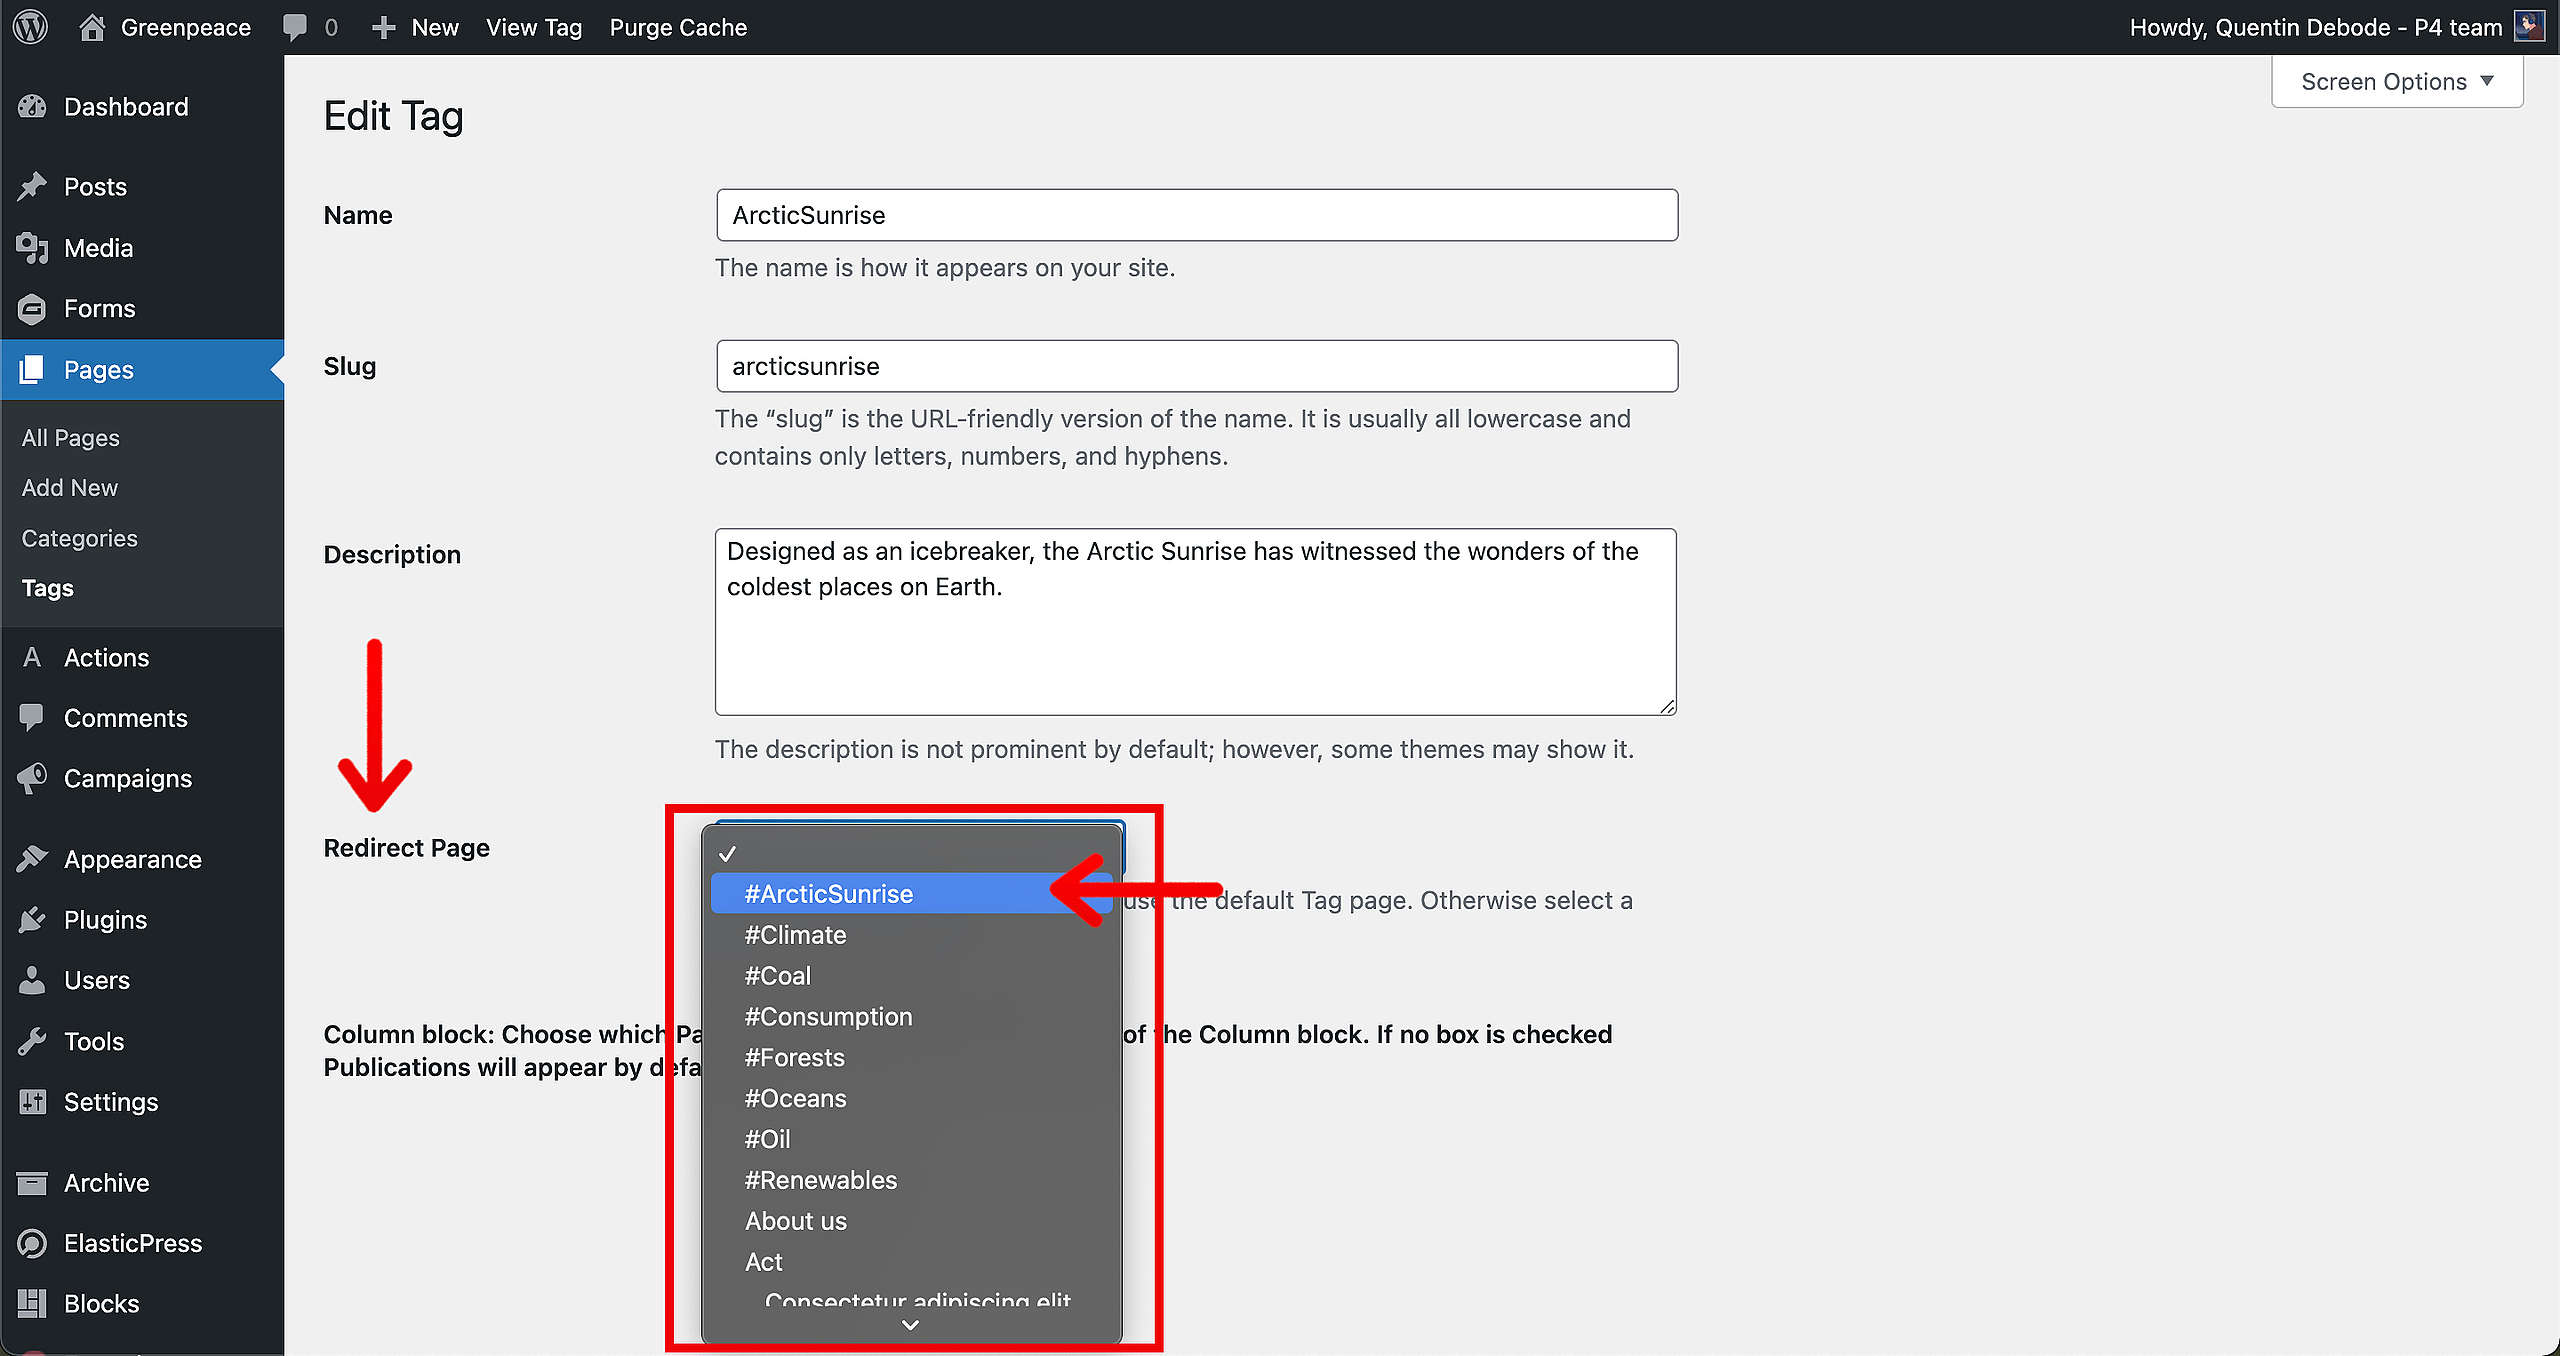
Return to the Tags in your backend Dashboard. Find your Tag and click on “Edit”.
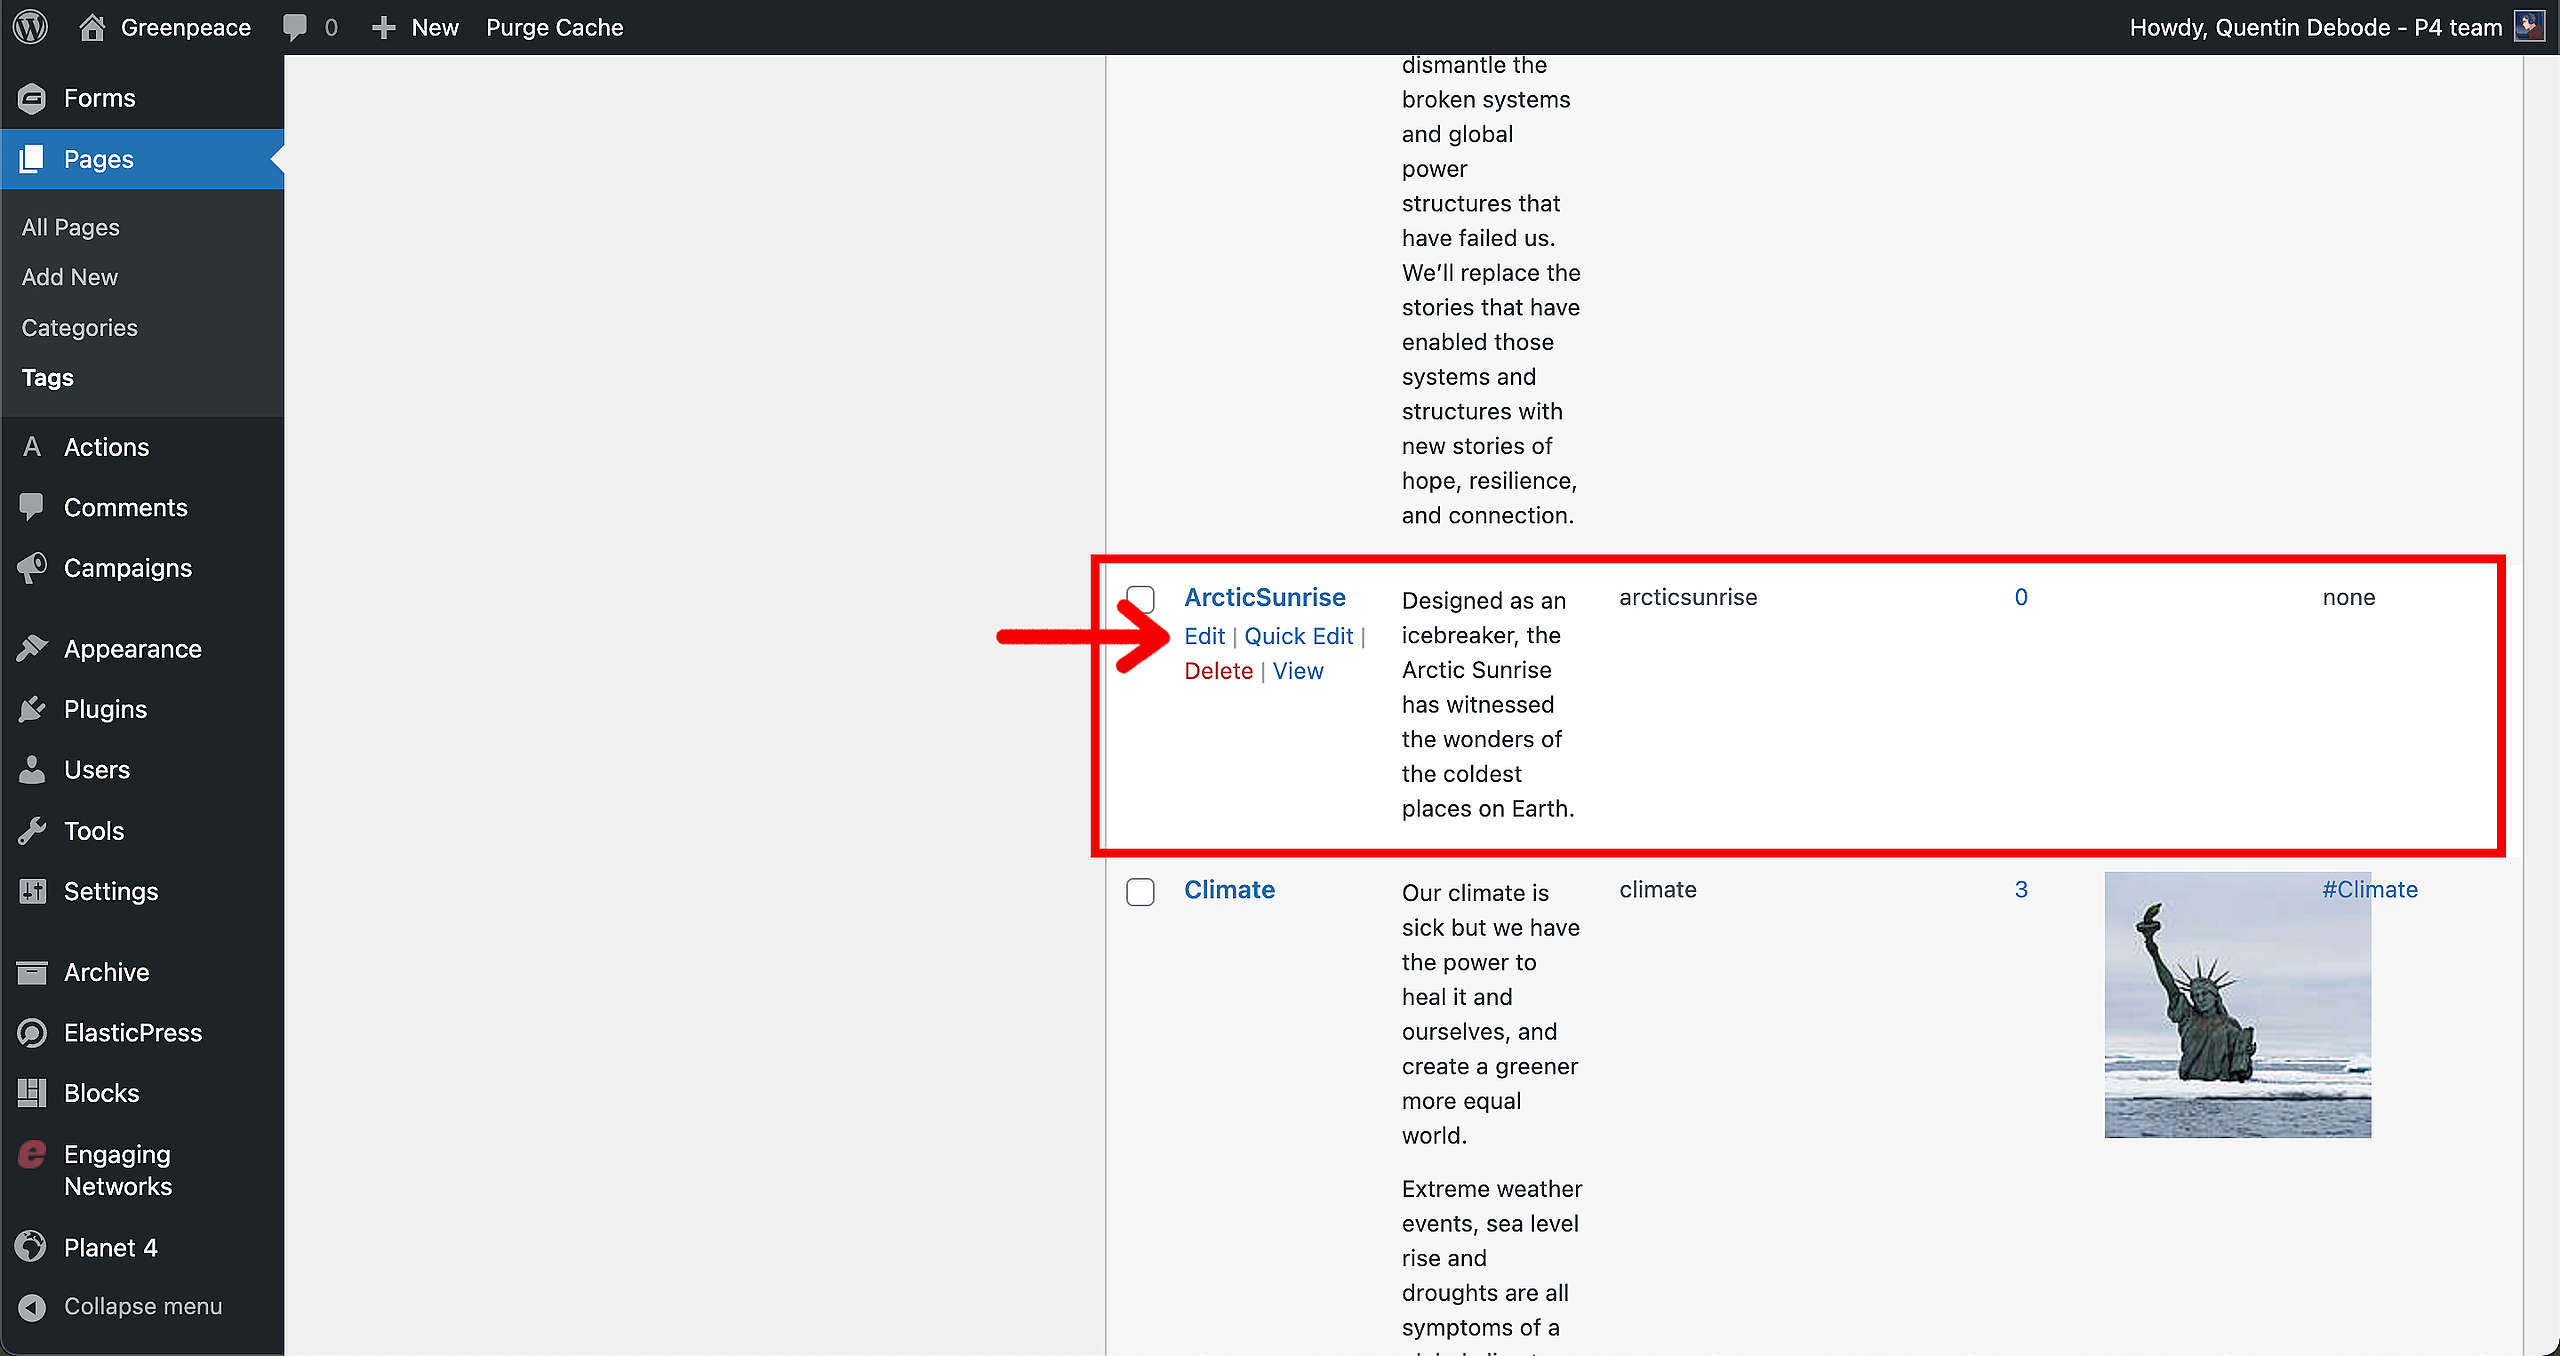
In the Redirect Page option, click on the dropdown and select the page you’ve just created and want to use as your proper Tag page.
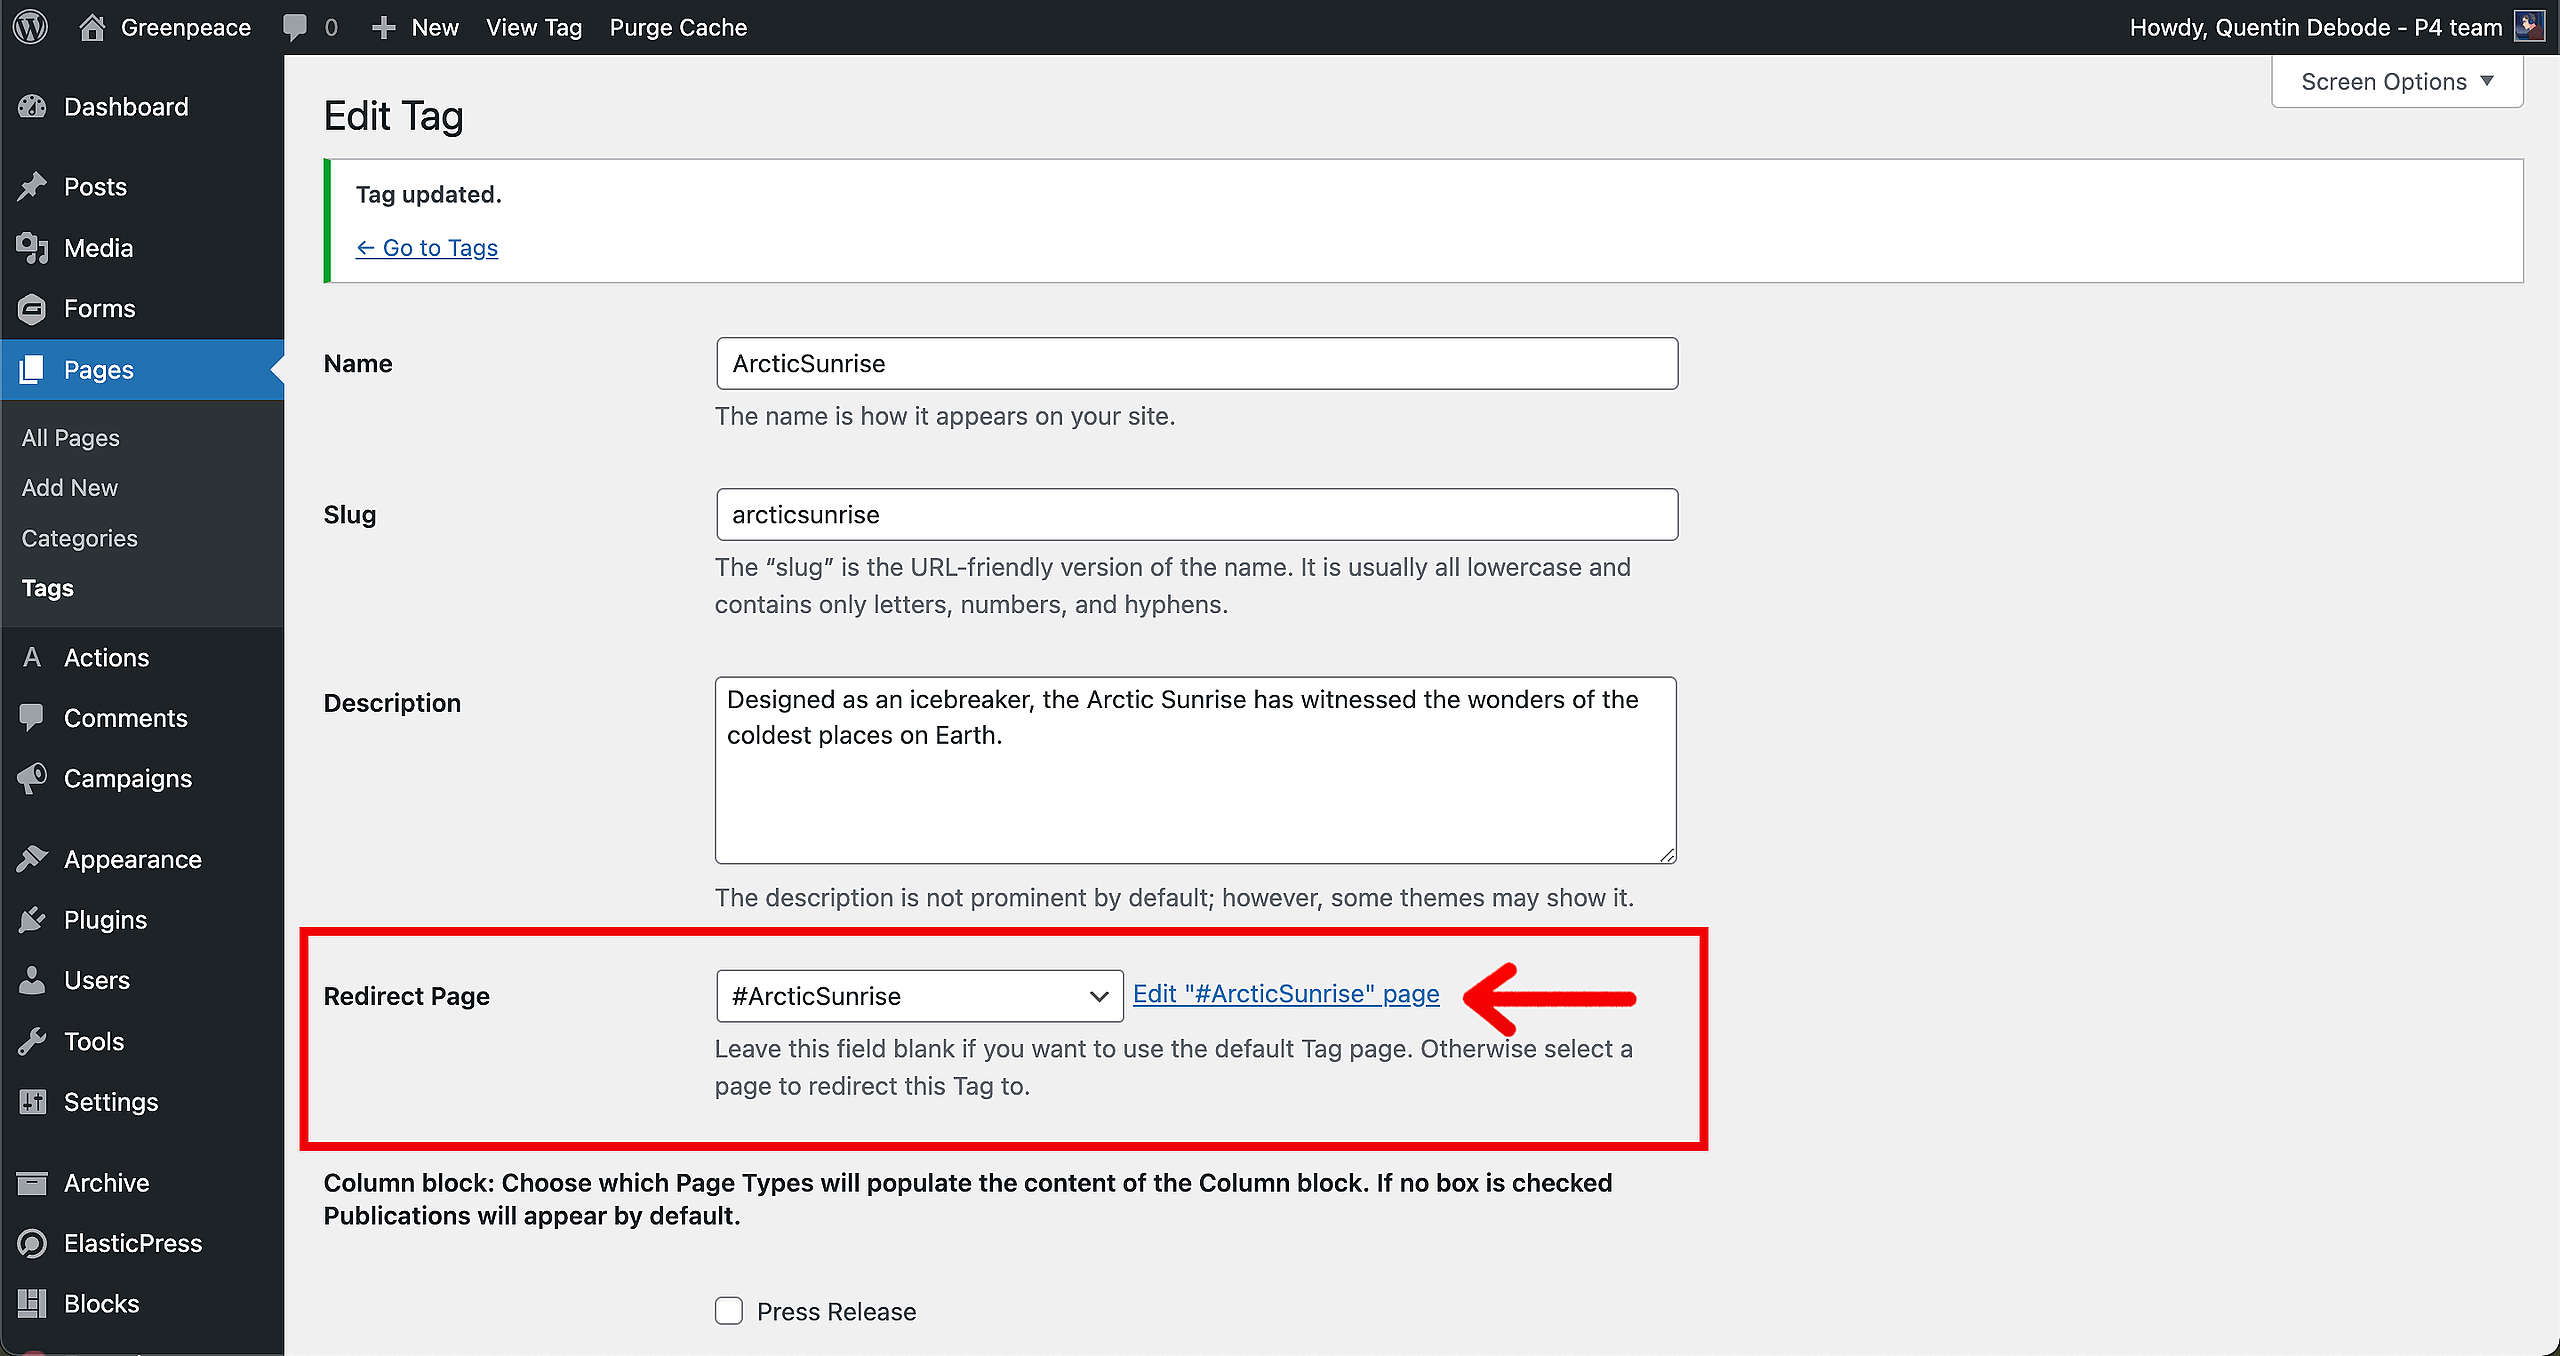
Click “Save”.
After that, the Tag and the page are connected. You can easily find the page by clicking the button next to the dropdown.
🧑💻 To start Creating a Page, go to this page in the Handbook.
Bulk edit Categories and Tags in Posts
Yes, you can! Here’s how to edit the Categories and Tags on several posts at once:
- Go to your Posts overview.
- Select all the Posts you want to edit the categorie or tag from
- Go to Bulk Actions and select Edit. Click Apply.
- In that new window that appeared, you can now edit categories and tags for all those selected Posts.
- You can also edit the Author, comment (on/off) and status in bulk.
- When finished, click on “update”.
See GIF below: