📚 Manage Planet 4 > Administration > Greenpeace Media (previously called Media Archive)
Purpose: The purpose of the Greenpeace Media is to allow Planet 4 users the option to import images directly from Greenpeace Media into their Media Library on Planet 4.
Greenpeace Media Overview
Import an image directly into the Media Library from the Greenpeace Media admin panel in the WordPress dashboard or directly into a Post/Page. In the admin panel Greenpeace Media, you can perform multiple searches of unique photo identifiers or keywords and you can also bulk select and upload several images at once.
Importing Images (Admin Panel vs Post/Page)
There are two options for importing images into your Media Library 1) in your admin panel and 2) directly in your Post/Page.
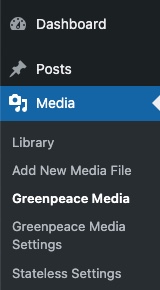
Admin Panel: To import images using the admin panel, open WordPress and find the Greenpeace Media on the left-side panel (or right-side for RTL screens). Select ‘Greenpeace Media’ the third option.
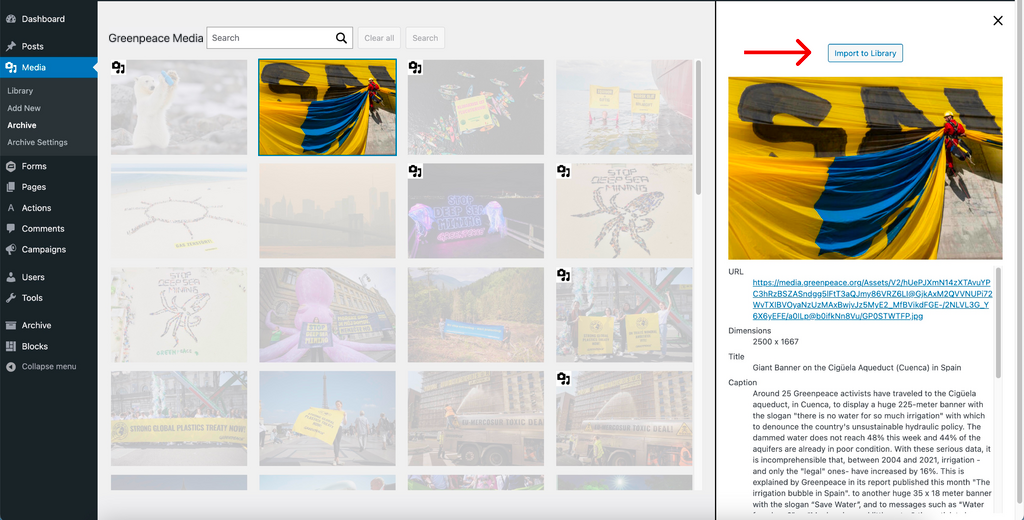
This will open the Greenpeace Media. There are further options for multiple search, bulk select/upload, and editing (see sections below) but for the basic import, you will select an image which will open up a modal that expands the image and provides further details (URL, Title, Caption, etc.)
Click on the button ‘Import to Library.’ This may take a moment. When it is done, the Media icon will appear in the left-hand corner and if you hover over it, the message ‘Added to Library’ will appear.
Post/Page: To import images using the editor in the Post/Page, open your Post/Page and select the image block. Click on the ‘Media Library’ Link. (Due to WordPress limitations, there is no ‘Greenpeace Media’ direct link from the image block, but it is located on the next screen).

When the Media Library box is opened, you can click on the ‘Greenpeace Media’ tab to open the Greenpeace Media.
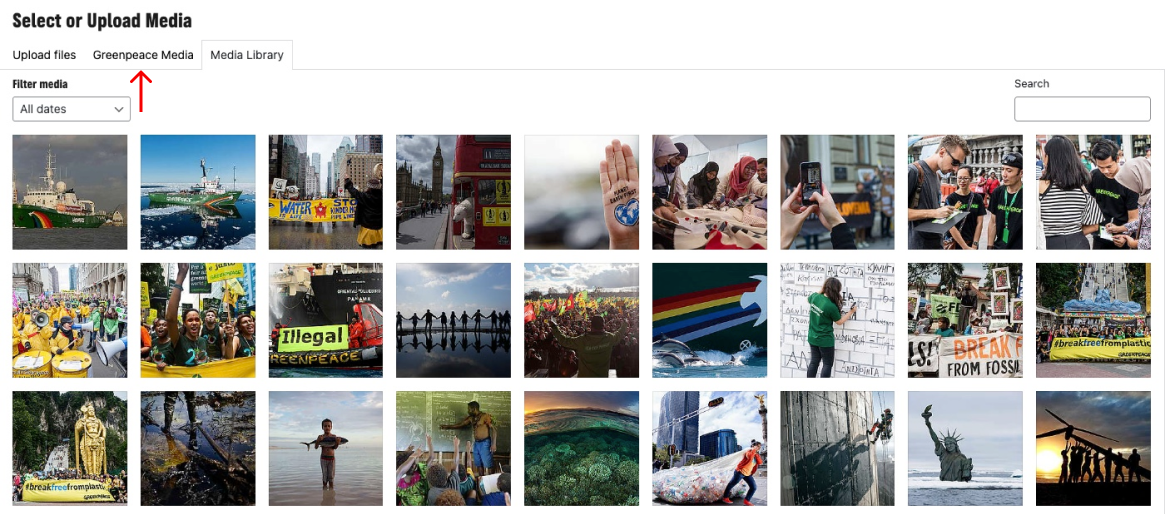
Once in the Greenpeace Media in the Post/Page, you can directly add the image to your Post/Page and it will also be imported to your Media Library at the same time. Please note: there are fewer functionalities with the Greenpeace Media in the editor of the Post/Page (you cannot edit or bulk upload). If you would like these functionalities, it’s recommended to import using the admin panel Media Library and then upload the image in your Post/Page from your Media Library.
Search Functionality
Use the search bar to search for any keyword (i.e. ship) or photo unique identifier (9 digit letter and number combination from the Greenpeace media) and relevant images will be displayed. Currently, you can make multiple searches of up to 6 unique identifiers and/or keywords at once. Hit enter or press ‘Search’ and you can continue searching for more keywords/unique identifiers. Click the ‘Clear all’ button to clear all search terms, or individually close out the search terms.

Bulk Select/Upload
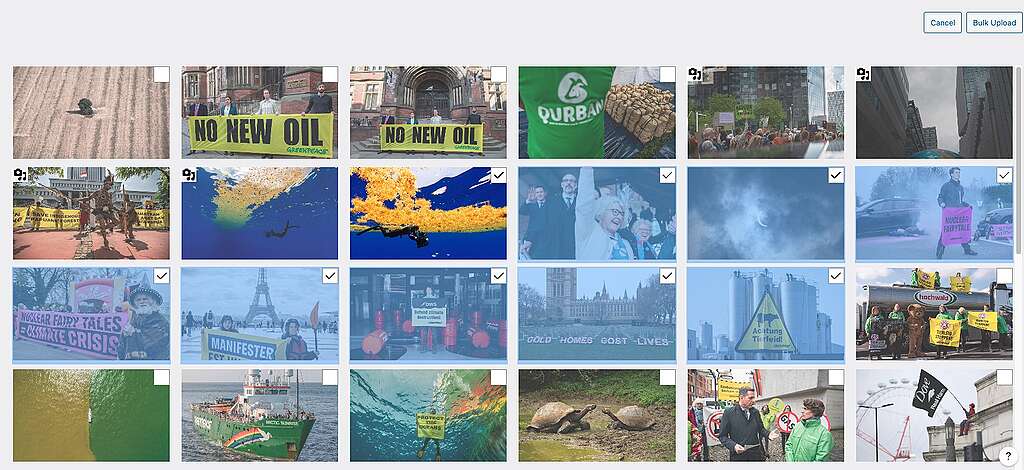
Editors can bulk select and bulk upload several images into the Media Library in the admin panel view. Click on the ‘Bulk Select’ button and the images below will be clickable. Select all of the images (up to 20 images) that you would like to bulk upload into your Media Library and click on the ‘Bulk Upload’ button when you are ready to upload them.
If you would like to select multiple images without individually clicking on each image, hold the SHIFT key down and select the first and last image and all images in between will be selected. Depending on the number of images, this process can take a moment. Once it is done, you will see an icon with a hover state indicating the images have been ‘Added to Media Library.’
Editing Images
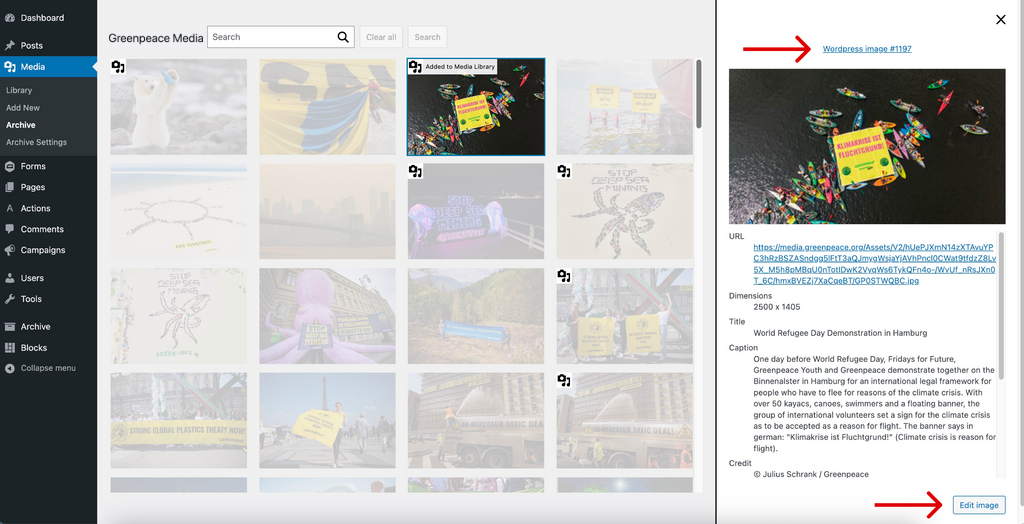
Once images have been uploaded to the Media Library from the Greenpeace Media, editors will see an icon with a hover state indicating the image has been ‘Added to Media Library.’ Within the admin panel, you can edit the image when you see this icon. There are two ways to edit 1) click on the image # link above the image (see image below for example) or click on the edit image button below (also in the example). When you click on either of these, you will be taken out of the Greenpeace Media and into your Media Library where you can edit. Please note, this is only possible within the admin panel and not within the editor itself. If you choose to upload an image directly in the Post/Page, the image will be added as is. To make further edits, please go back to your Media Library and make any edits necessary and re-upload directly.
EXAMPLE: I want to edit the caption of an image I just added to my Media Library
- I have followed the steps listed above in the ‘Importing Images’ section
- I click on the link above the image or the edit image button below
- I am then brought to the Media Library Editor where I can edit the caption (and any other areas I would like to edit)
- I click save and the image is edited and saved in my Media Library
