Edit your P4 Profile
All posts and pages you create have your style, signature, picture and bio. Here’s how to make your P4 profile unique, just like you.
📚 Manage Planet 4 > Administration > Edit P4 Profile
Before you get started
- A P4 Admin must create your profile and give you access before you are able to edit your P4 profile.
- For your Author Profile to appear on your Posts you must add a Bio, a profile picture is optional.
- The Author’s page will be linked only if the post is assigned to an author. In case of “Author Override” (Create Posts > Author Override), the author’s name will be there but it won’t be linked to the author’s profile page.
Edit your Profile picture (avatar)
The profile picture used in P4 is fetched from your Greenpeace Google profile. So in order to have a picture being part of your P4 profile you just need to set it up on Google first.
- Login to your Google workspace account using your Greenpeace email.
- Browse to “Personal Info” from the sidebar. There you can pick or change your Profile picture.

- Now go back to P4 and login again. If you were already logged in, you will have to logout and login again for the new Profile picture to be fetched.
Edit your Bio
🔎 Where can I find this ? Dashboard > Users > Your Profile

Translate your Bio (for multi-language sites)
🔎 Where can I find this? Dashboard > WPML > String Translation
For multi-language P4 sites, it is possible to translate authors’ bios:
- Go to WPML’s > String Translation and add authors as translatable strings

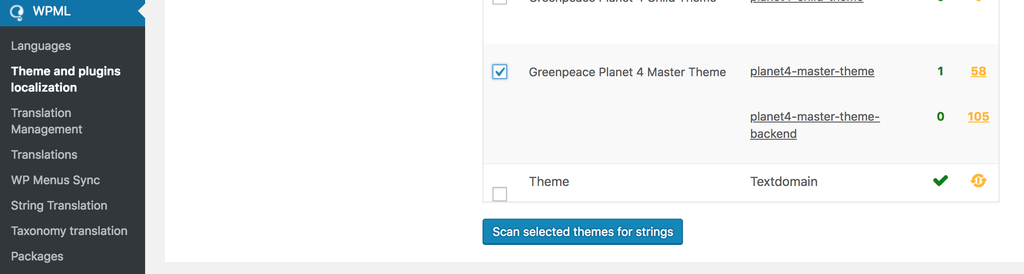
- Go to WPML’s > Theme and plugins localization. Scan the template for translatable strings, this should collect the authors strings for translation:
- Go back to String Translation and edit the corresponding author bios:
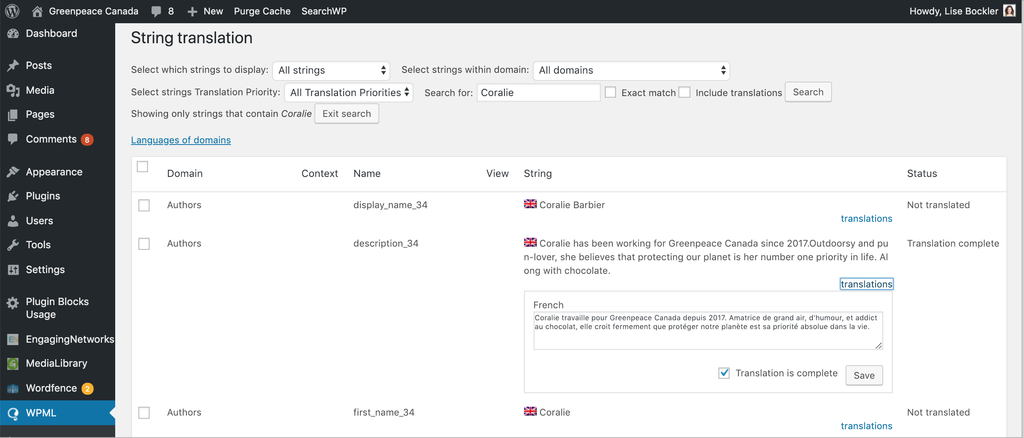
- Enjoy your new translation.
🤔 Key Info : For the language switcher to show, the author must have written posts in both languages. Authors should have their bios in both languages to appear. If YOU translate a post to test this, remember to change the post’s author to the corresponding author, otherwise, the translated post will belong to “admin”, your user.
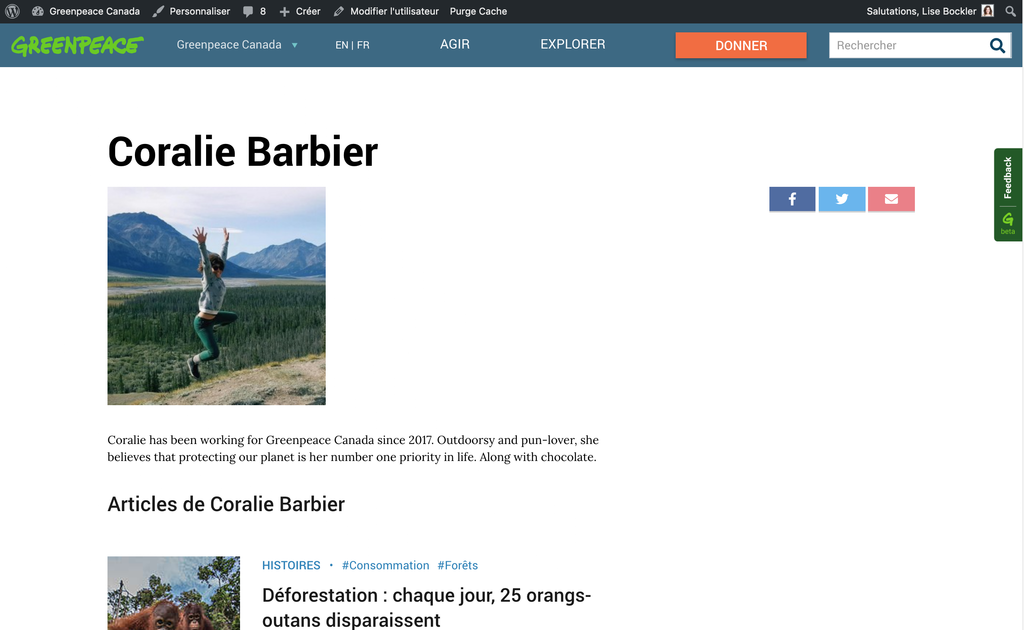
Here’s also an animated preview with the final result:
Check your profile!
You can always go to any post you wrote and check how your Bio at the bottom of the post looks.

Editing an Avatar for someone else
If an Editor won’t change the Profile picture themselves or would never login to P4, then an Admin can do it for them. There are two important downsides to this:
- The User account won’t be associated with their GP email address. So they will no longer get email notifications for comments on their posts.
- The process of adding or changing their Profile picture involved creating a WordPress Gravatar account, which is a cumbersome process.
⚡ We strongly encourage against this practice. Instead create a P4 account for them and all they have to do is login once. Even if it’s a functional / service account you can still set up a Profile picture in Google, create and account in P4 with that email and just login.
But if you have no other option, these are the steps you need to follow:
- As an Admin: To change an Editor’s Avatar you must use an email address to which you have access in order to complete this process (see step #10).
WP will not allow you to use the same email for multiple users. So as a Admin I would use, for example, my webmaster email + User’s Global ID e.g. [email protected] - Go to the User Profile in P4 and generate a new WP PW
(don’t worry, the Editor should be using their Google/GP login, not WP. So you will not be locking them out) - Make a note of this PW + the User Name of the Editor you are working on, then Update User/Save
- Sign out of P4
- Sign in as the User, using their User Name + the new PW you generated
- Go to ‘Profile’ in the left nav
- Click on “You can change your profile picture on Gravatar.”
- Sign in to Gravatar
- Click on ‘Add Email address’ and enter the new address you created in step #1
- Go to your email and click on the link to verify the new identity
- Go back to Gravatar
- Choose the email address you want to modify
- Click on ‘Add new image’
- Click on ‘Upload new’
- Click on ‘Choose image’
- Click on ‘Next’
- Crop/centre image
- Set rating (in case your Gravatar may not be suited for younger or sensitive audiences. ? )
- Select where (which email) you would like to use the image
- Return to P4 and refresh to confirm.

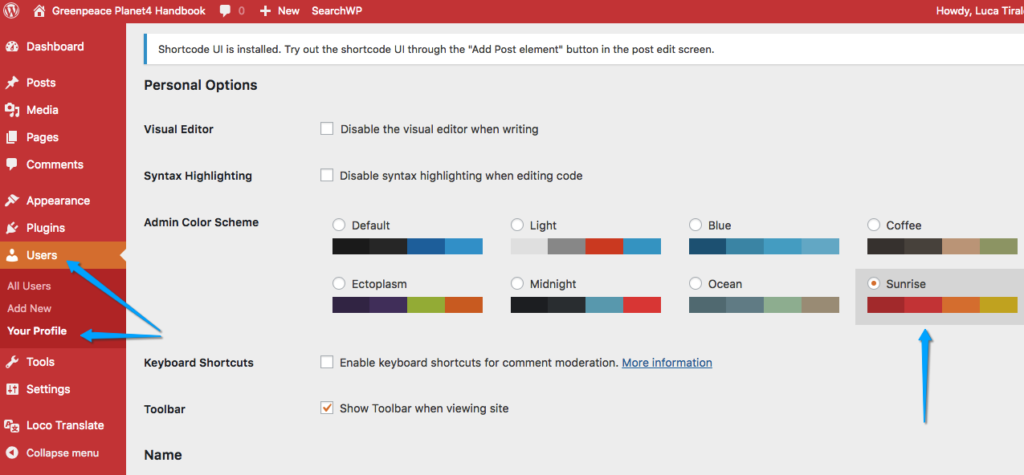
Change the appearance of the Admin Panel
If you are managing multiple WordPress or P4 websites, different menu colours are super useful to quickly realise which site you are working on.
See the red menus of the snapshot below? It’s a color scheme called “Sunrise“.