Need to set up a News & Stories Page from scratch? This overview will help you out, from the very beginning, to adding content, to page settings and publishing.
📚 Create Content > Pages > News & Stories Page
Creating a new page
The News & Stories Page is the place where visitors find the most recent updates on current events. It’s a place that constantly moves, but here is the good news: It’s all auto generated.
New page
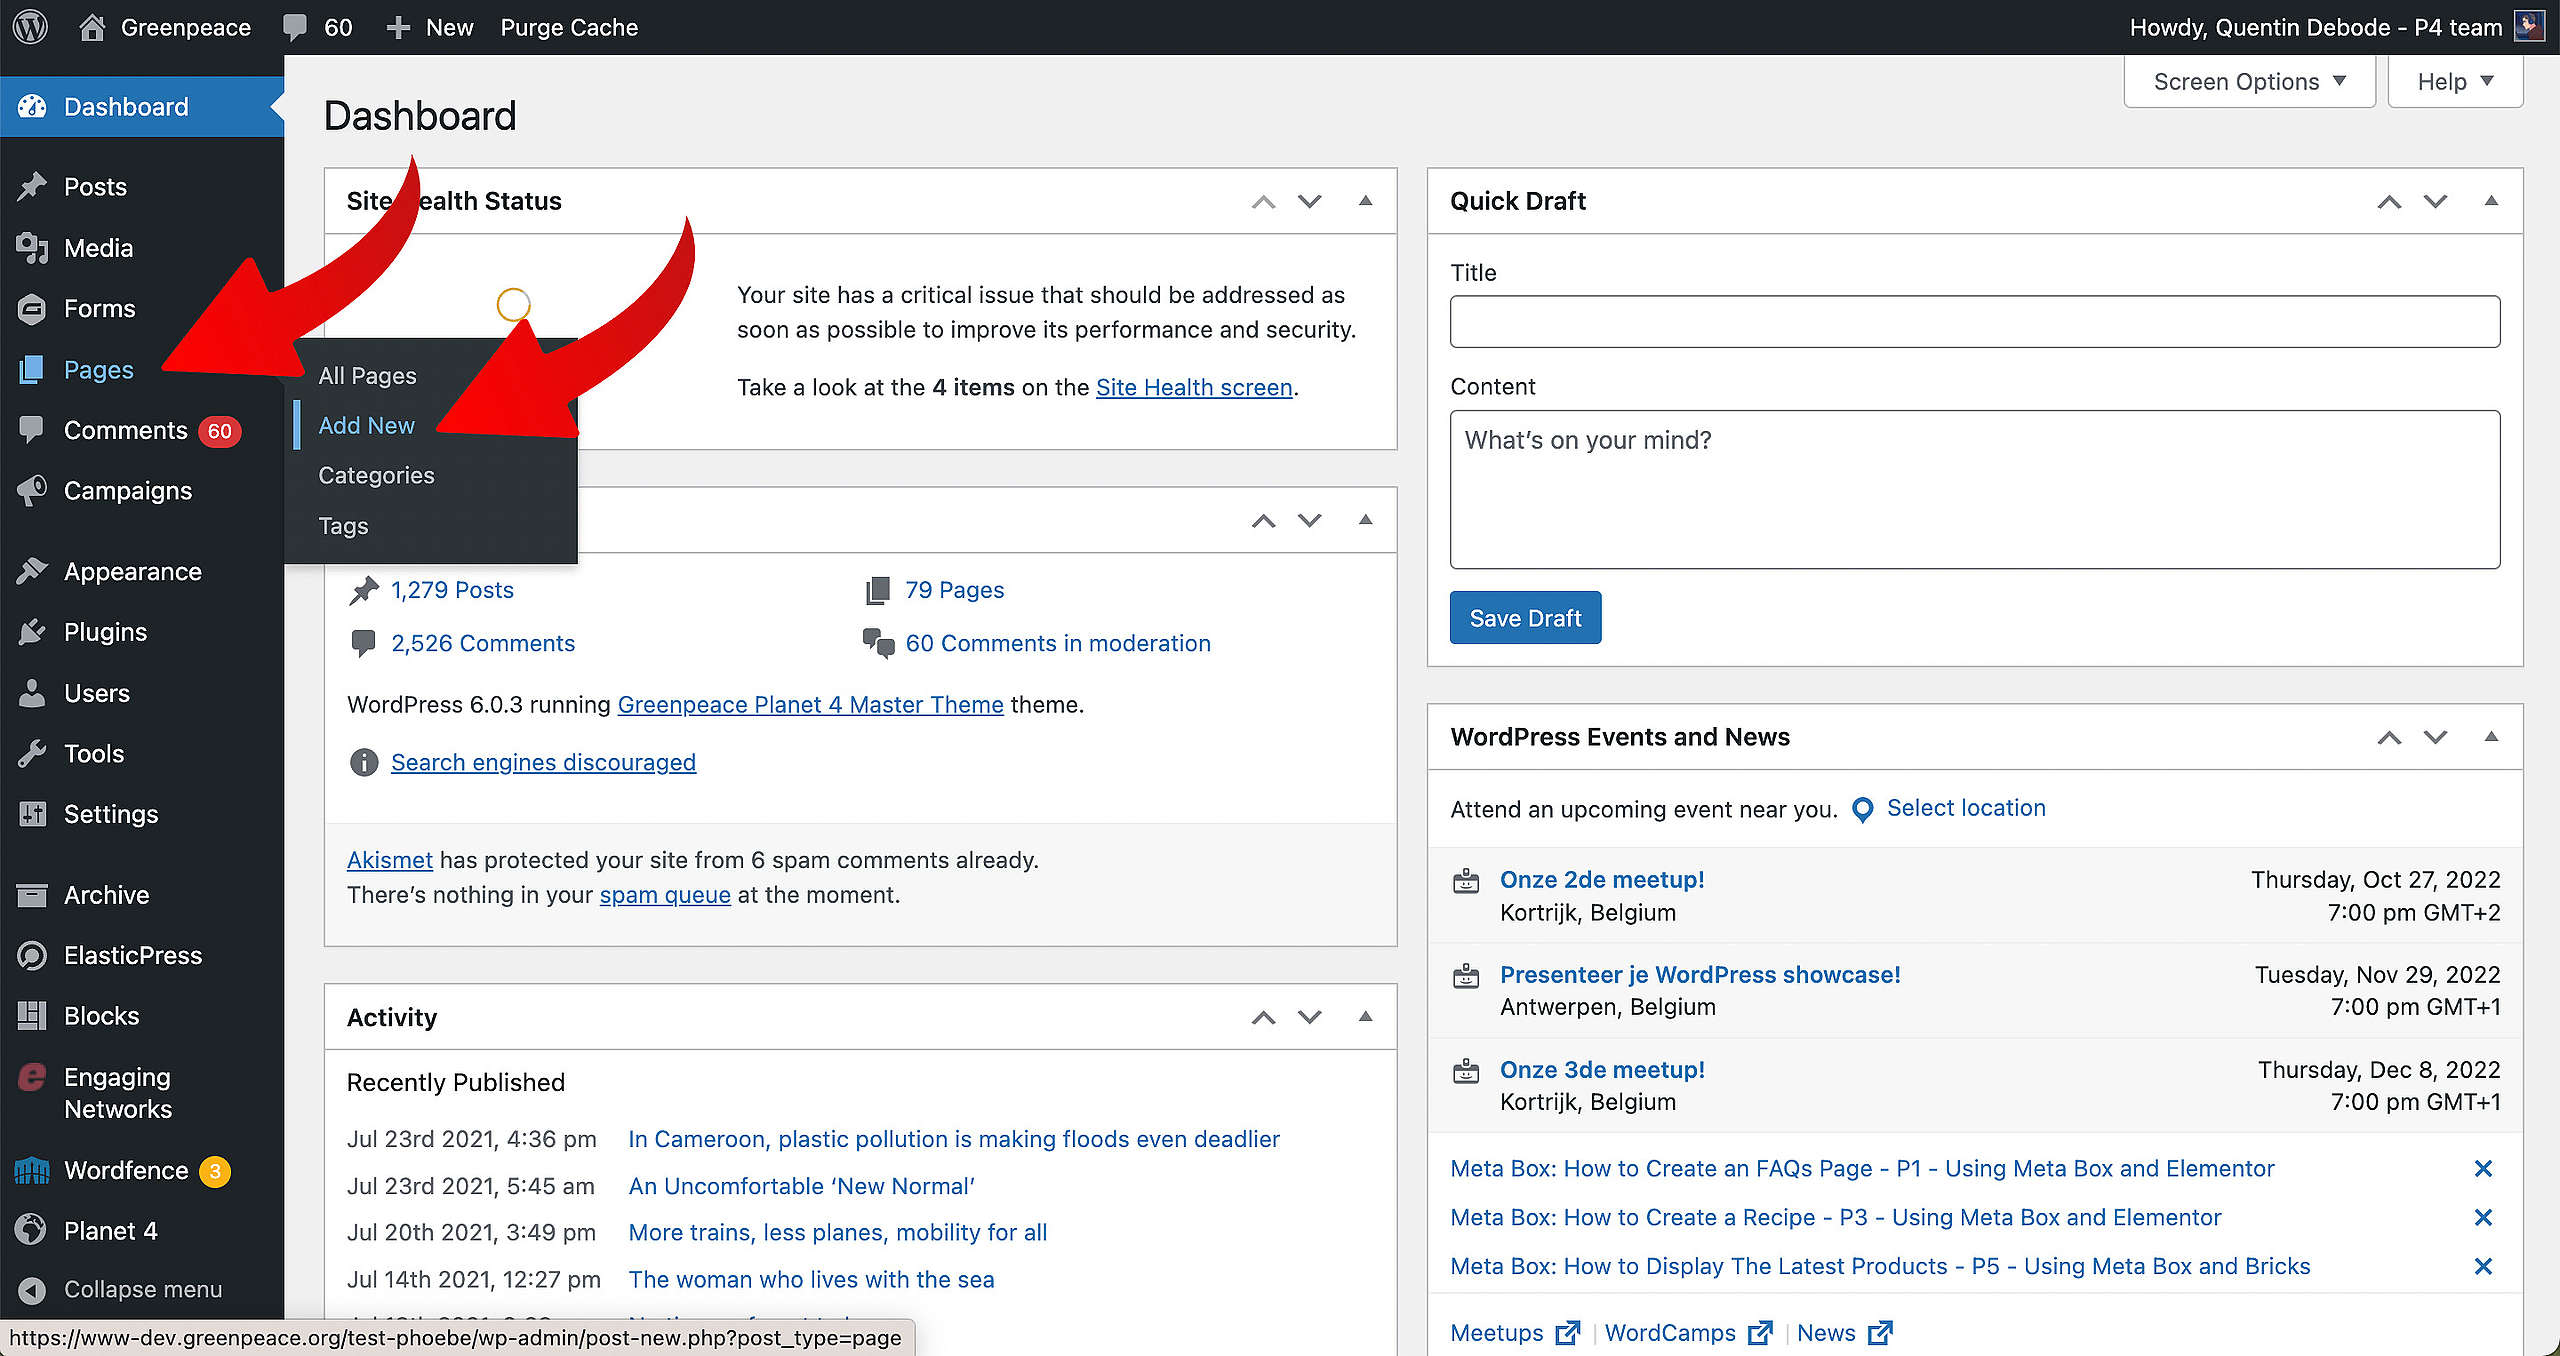
🔎 Where can I find this ? Dashboard > Pages > Add new
Let’s start. First, go to your Dashboard and select “Pages”. You’ll be able to create a new page there, by clicking “Add New”.

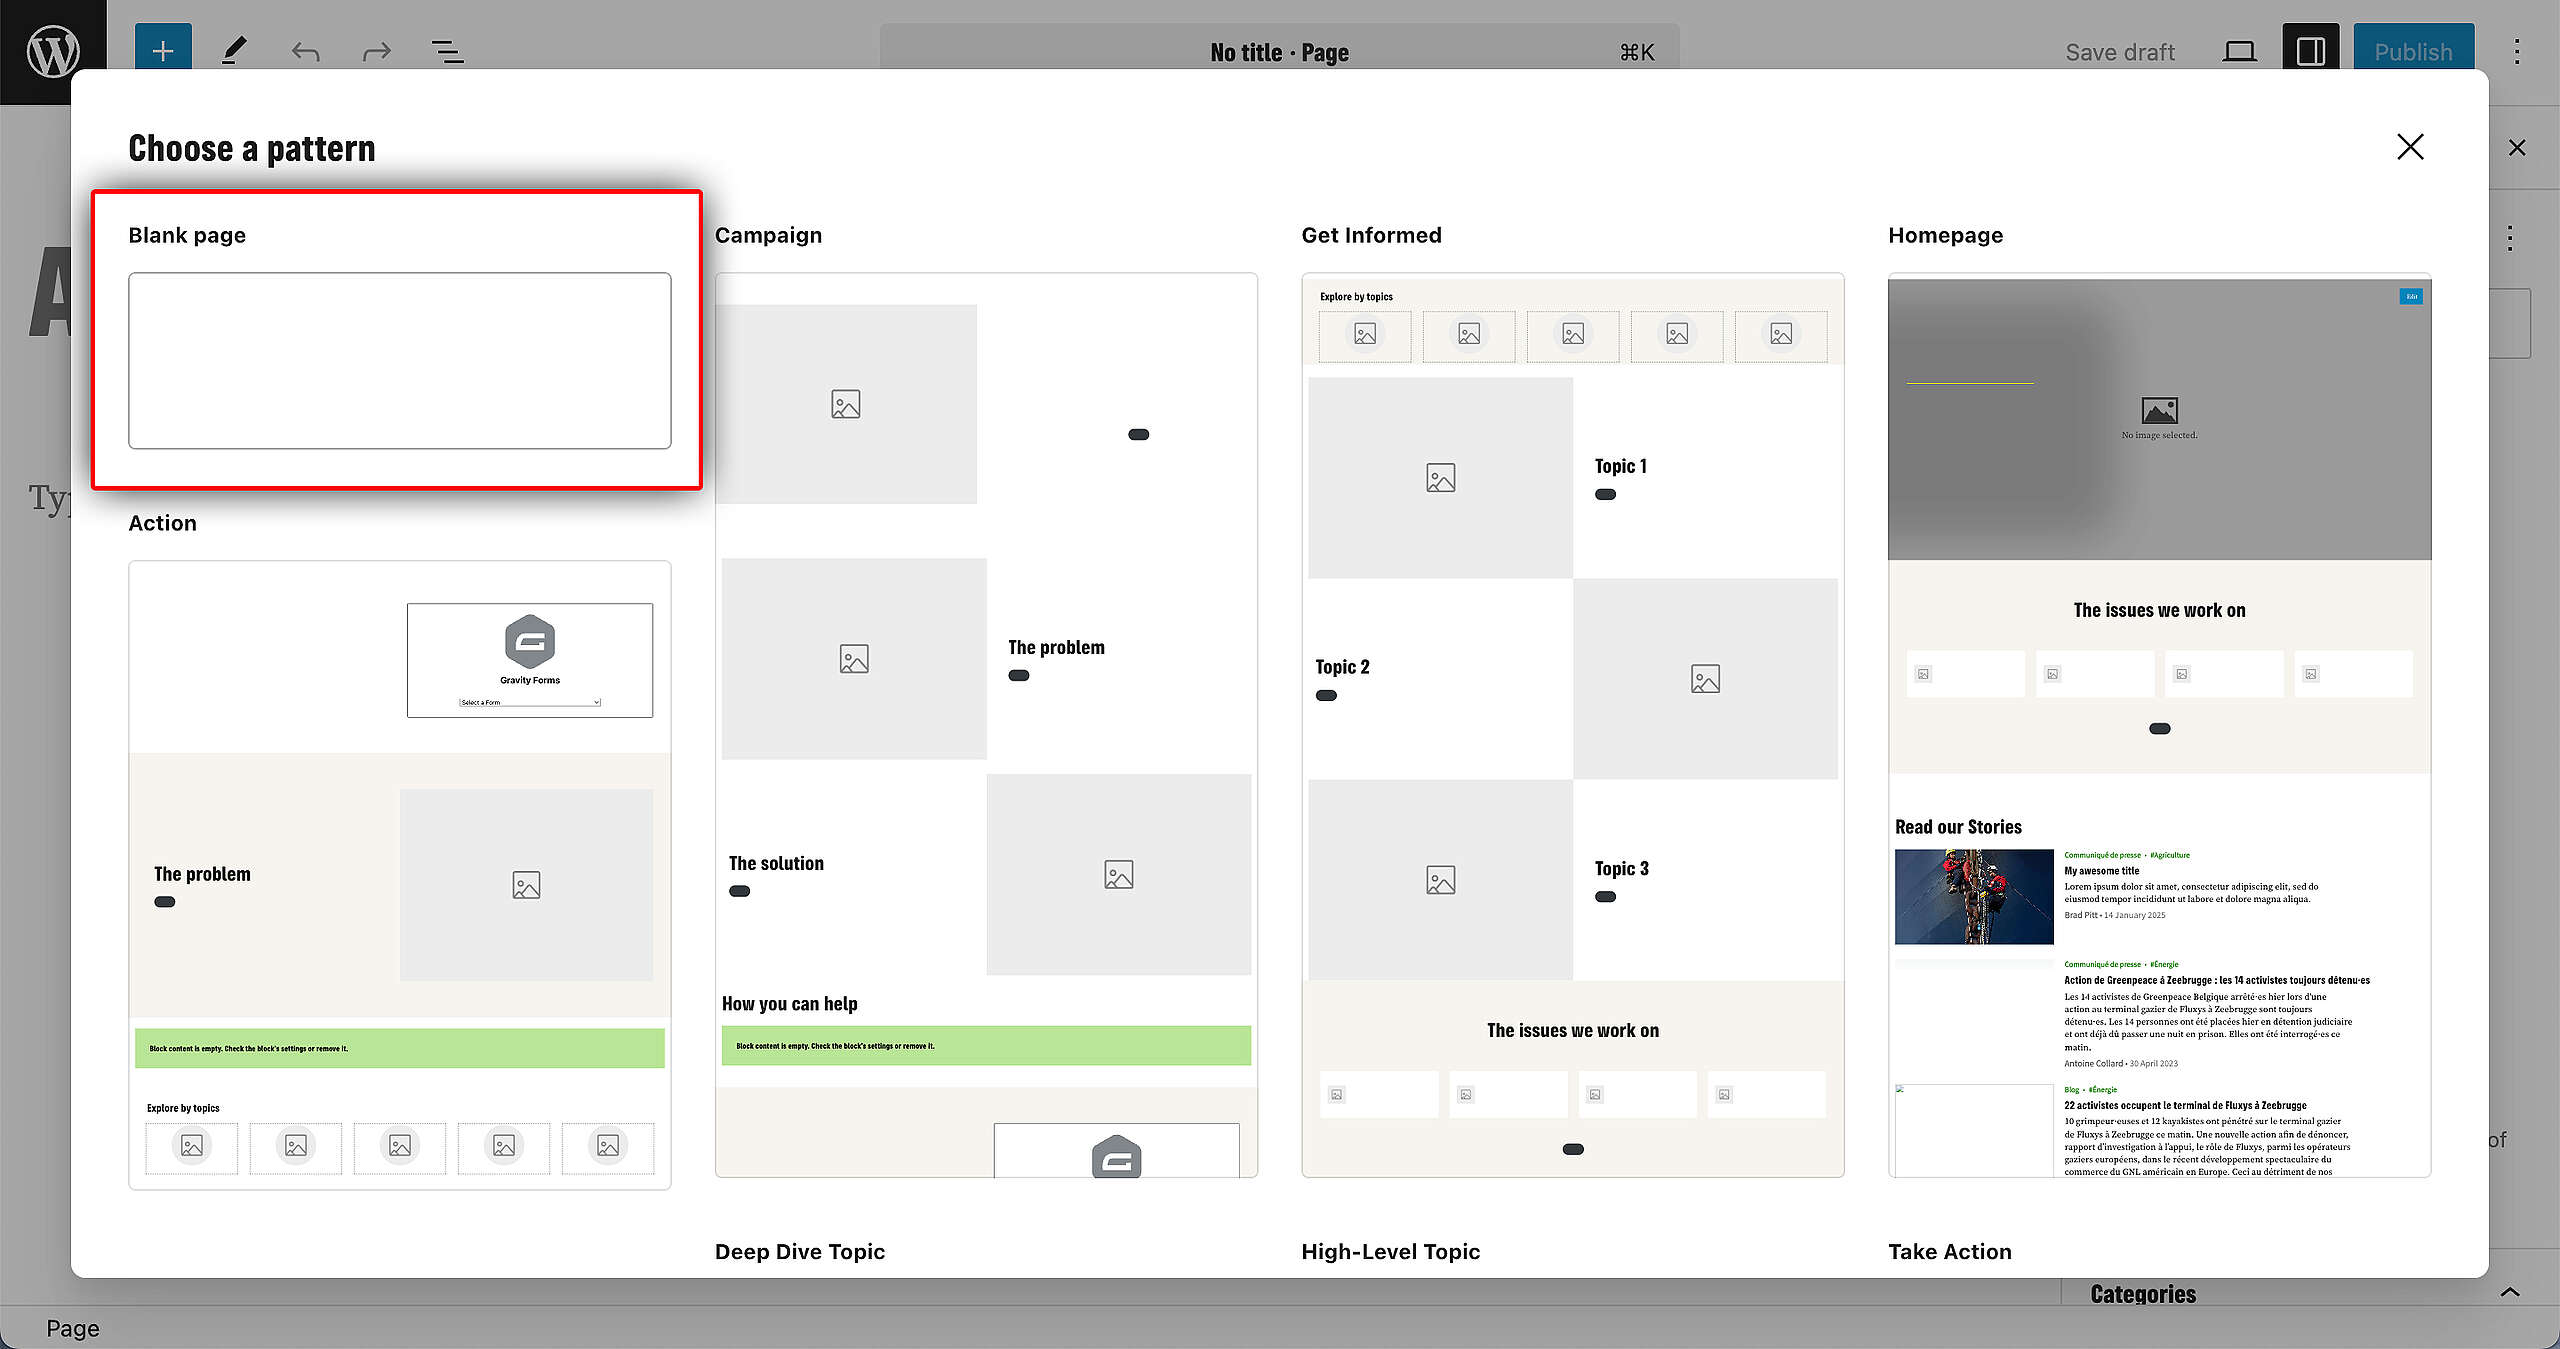
When you’re loaded into your new page, you’ll get a screen where you can select a pre-existing pattern. For this example, we’ll be selecting the blank pattern.

After you’ve done this, publish the page. There’s no need to load in Blocks or do anything with the page, feel free to leave it blank. The content of the page will be auto-generated as soon as you’ve confirmed the page as a News & Stories Page, so let’s get to that step:
Confirming the News Page as the News Page
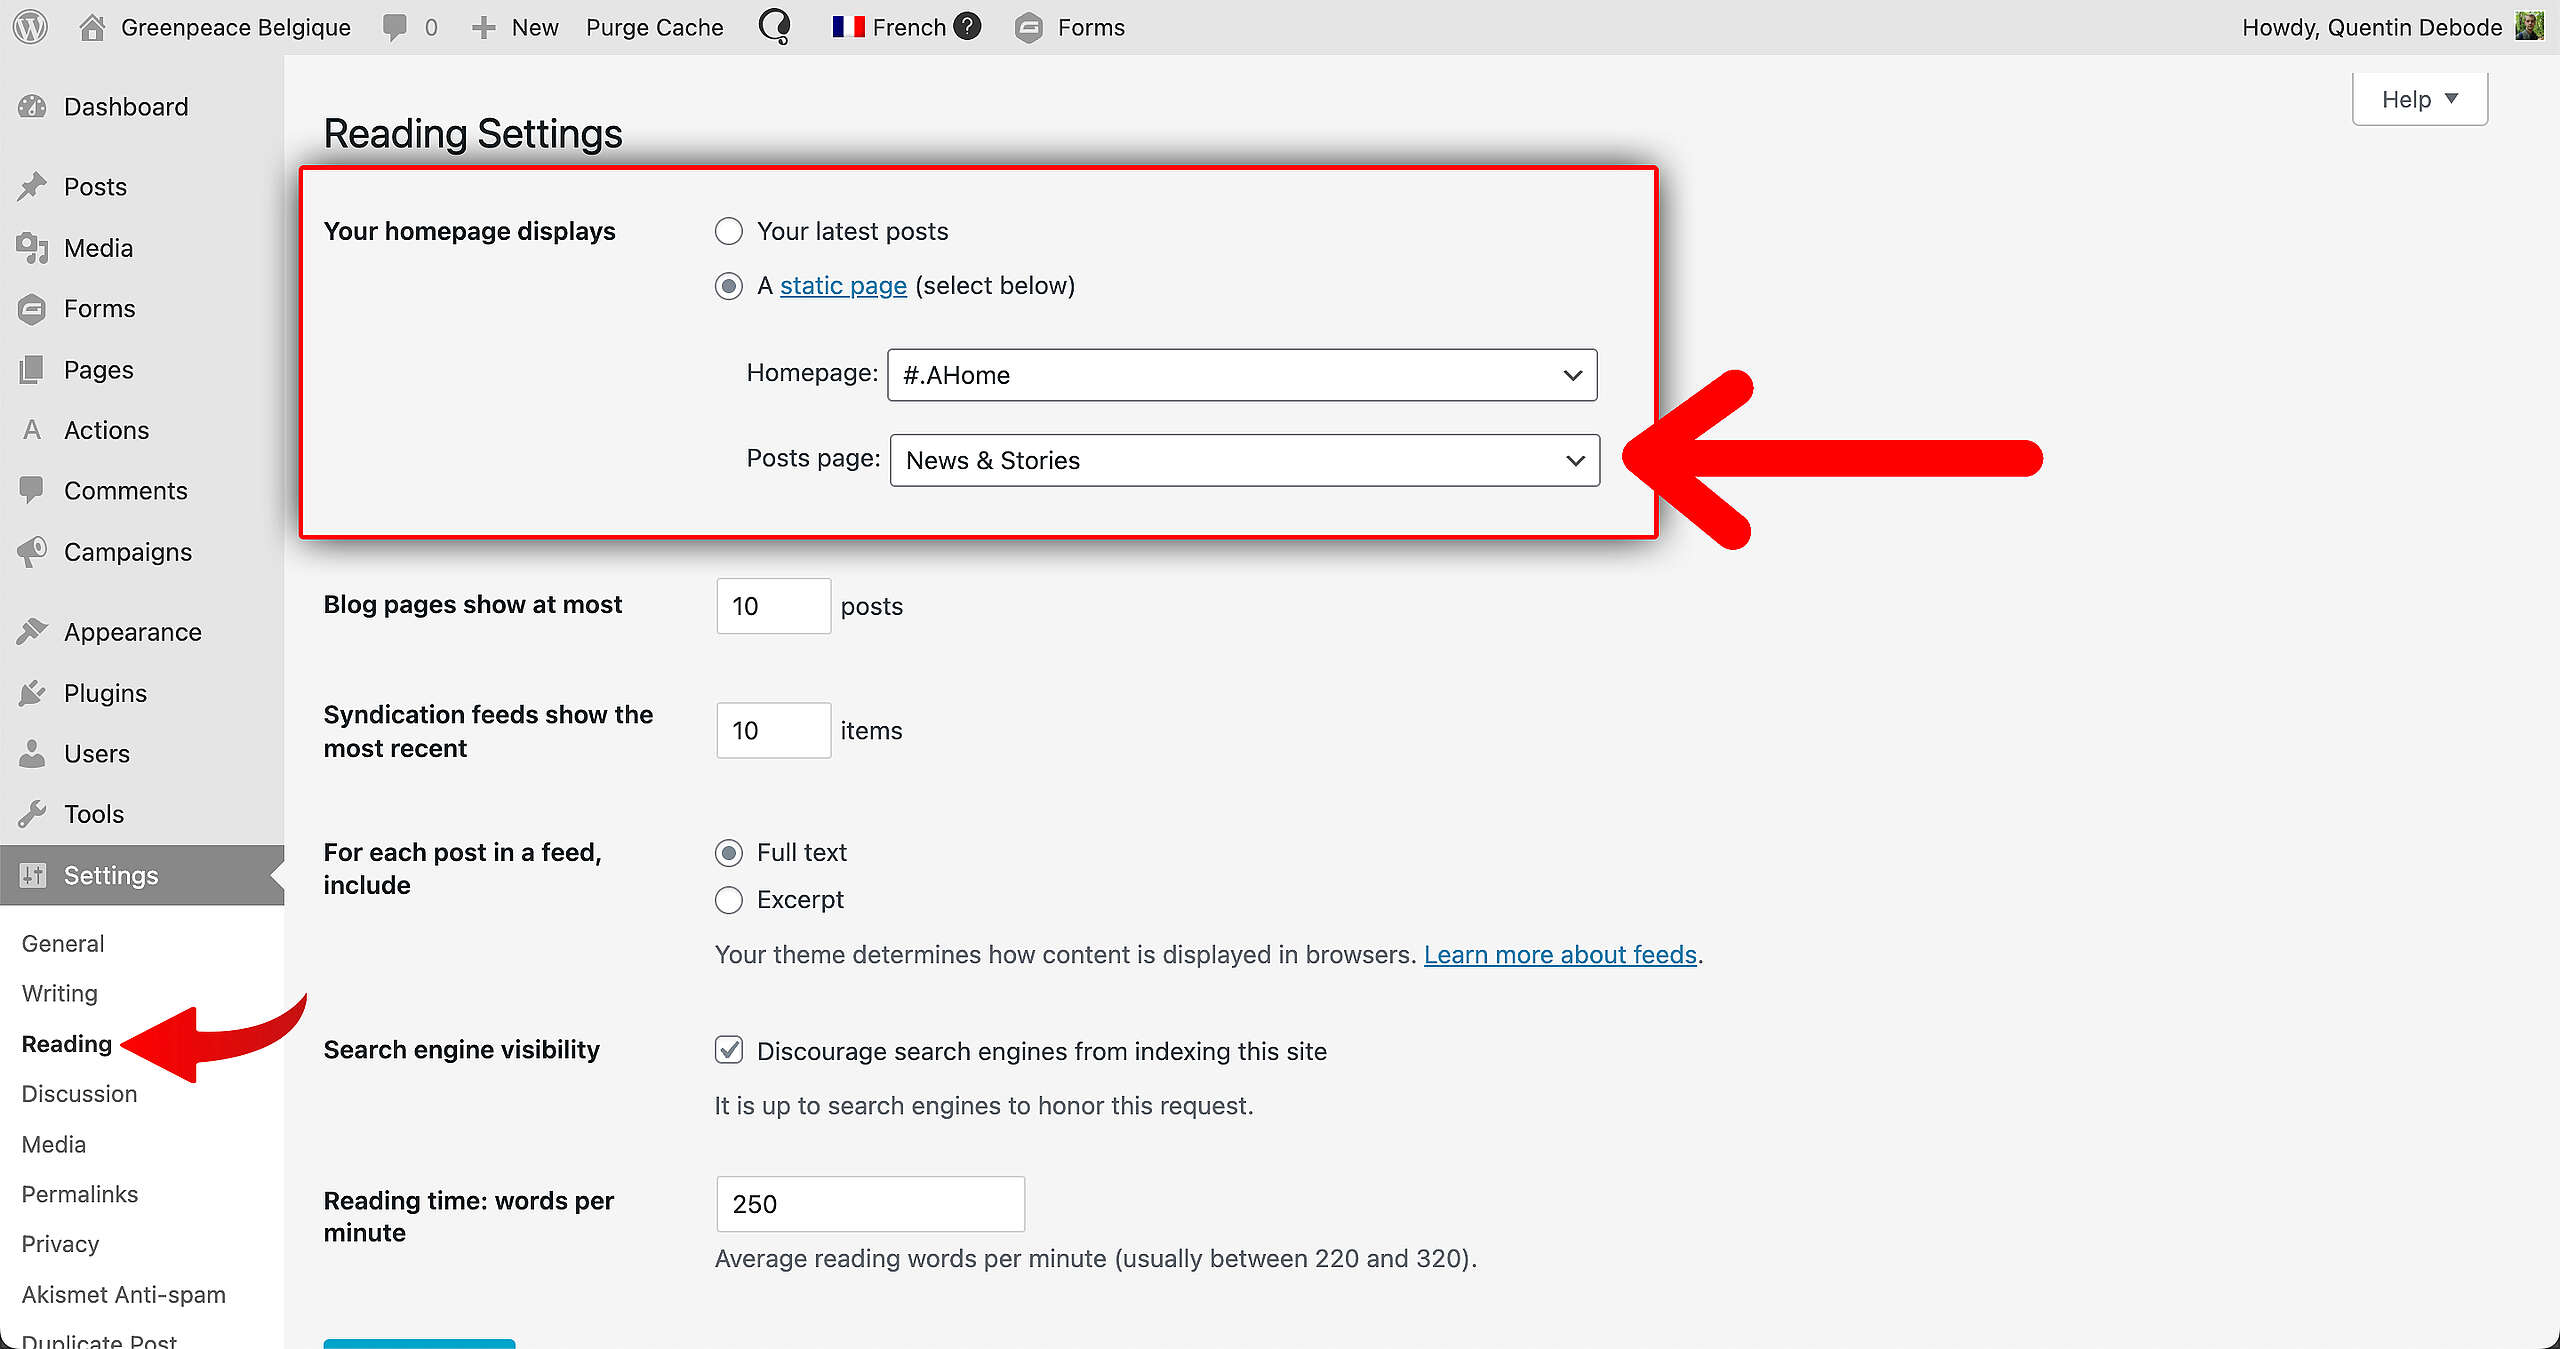
🔎 Where can I find this ? Dashboard > Settings > Reading
To confirm your News & Stories Page as the actual News & Stories Page, you have to go to the Reading Settings. You can find these at Dashboard > Settings > Reading. There, change the Homepage Display as a static page. In the dropdown for Posts Page, select the page you’ve just created to confirm that as the News & Stories Page.

Once you’ve done this, the page will feature recent articles. All auto-generated, easy.
More on Creating and Managing Pages
Links & Resources
“Checking technical options, we discovered…” – Technical investigation
Architectural strategy – Multi-instances approach decision
Creating the first prototype – implementing Multi-instance P4 sites
